Eduard Caliman - Minotti Space

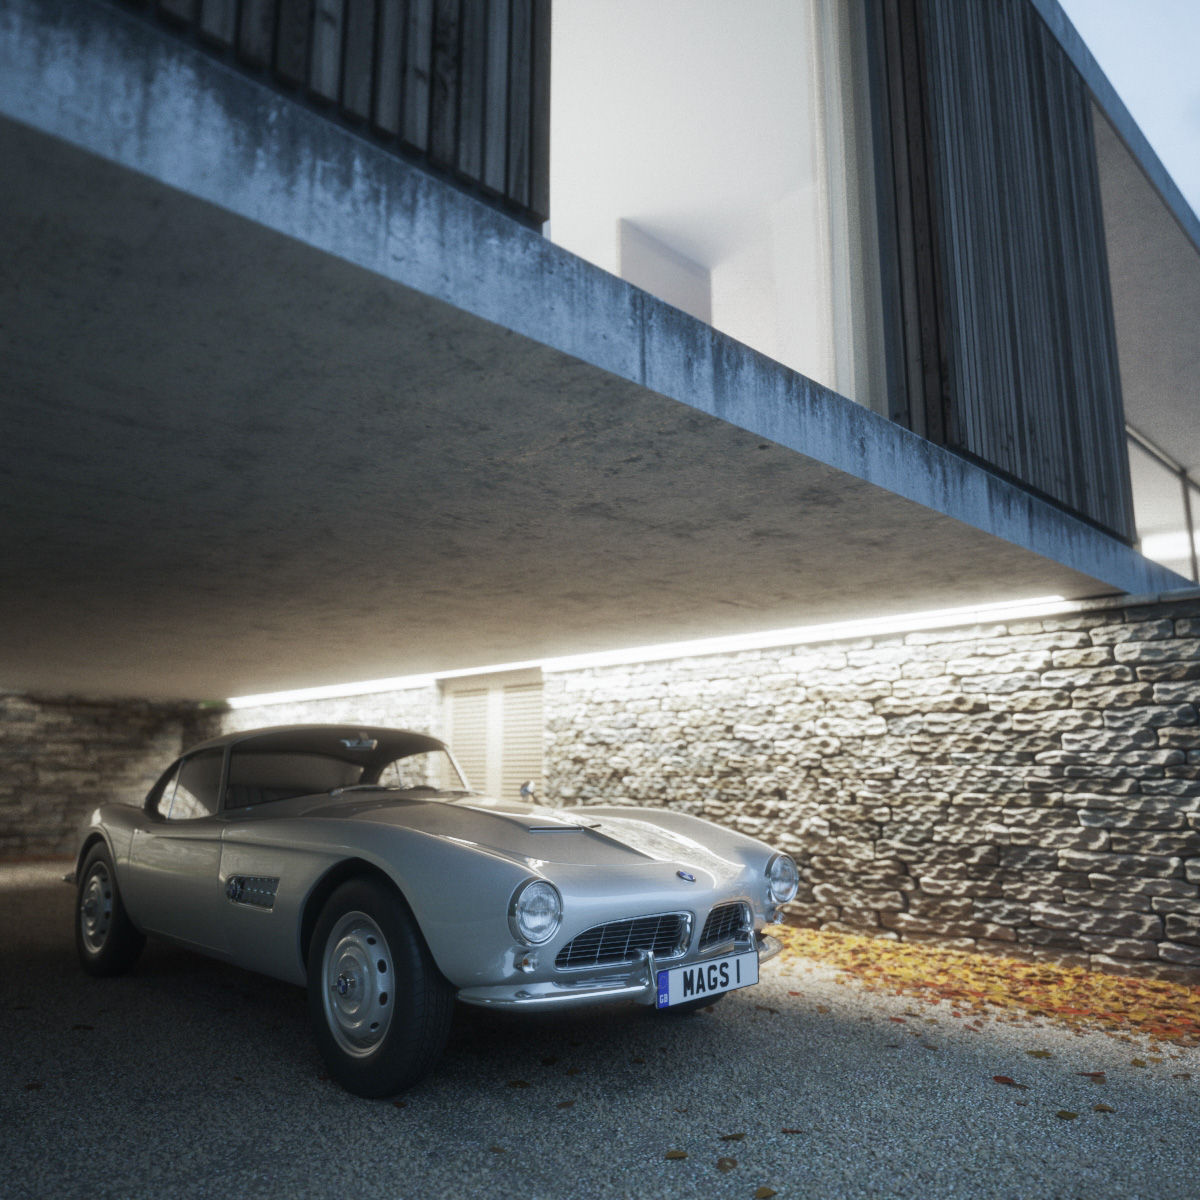
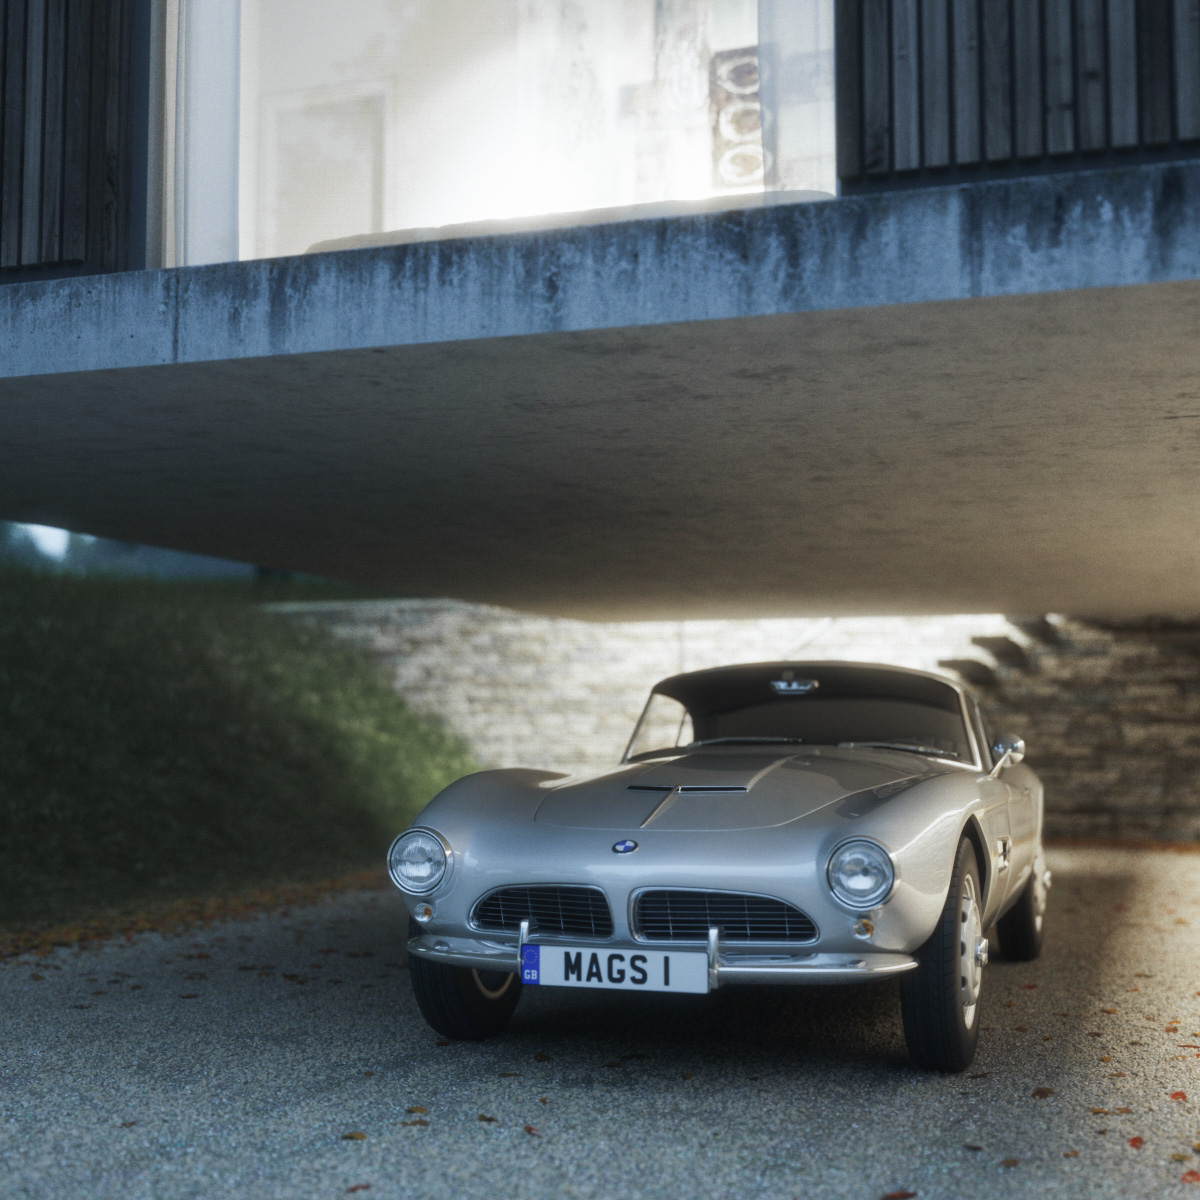
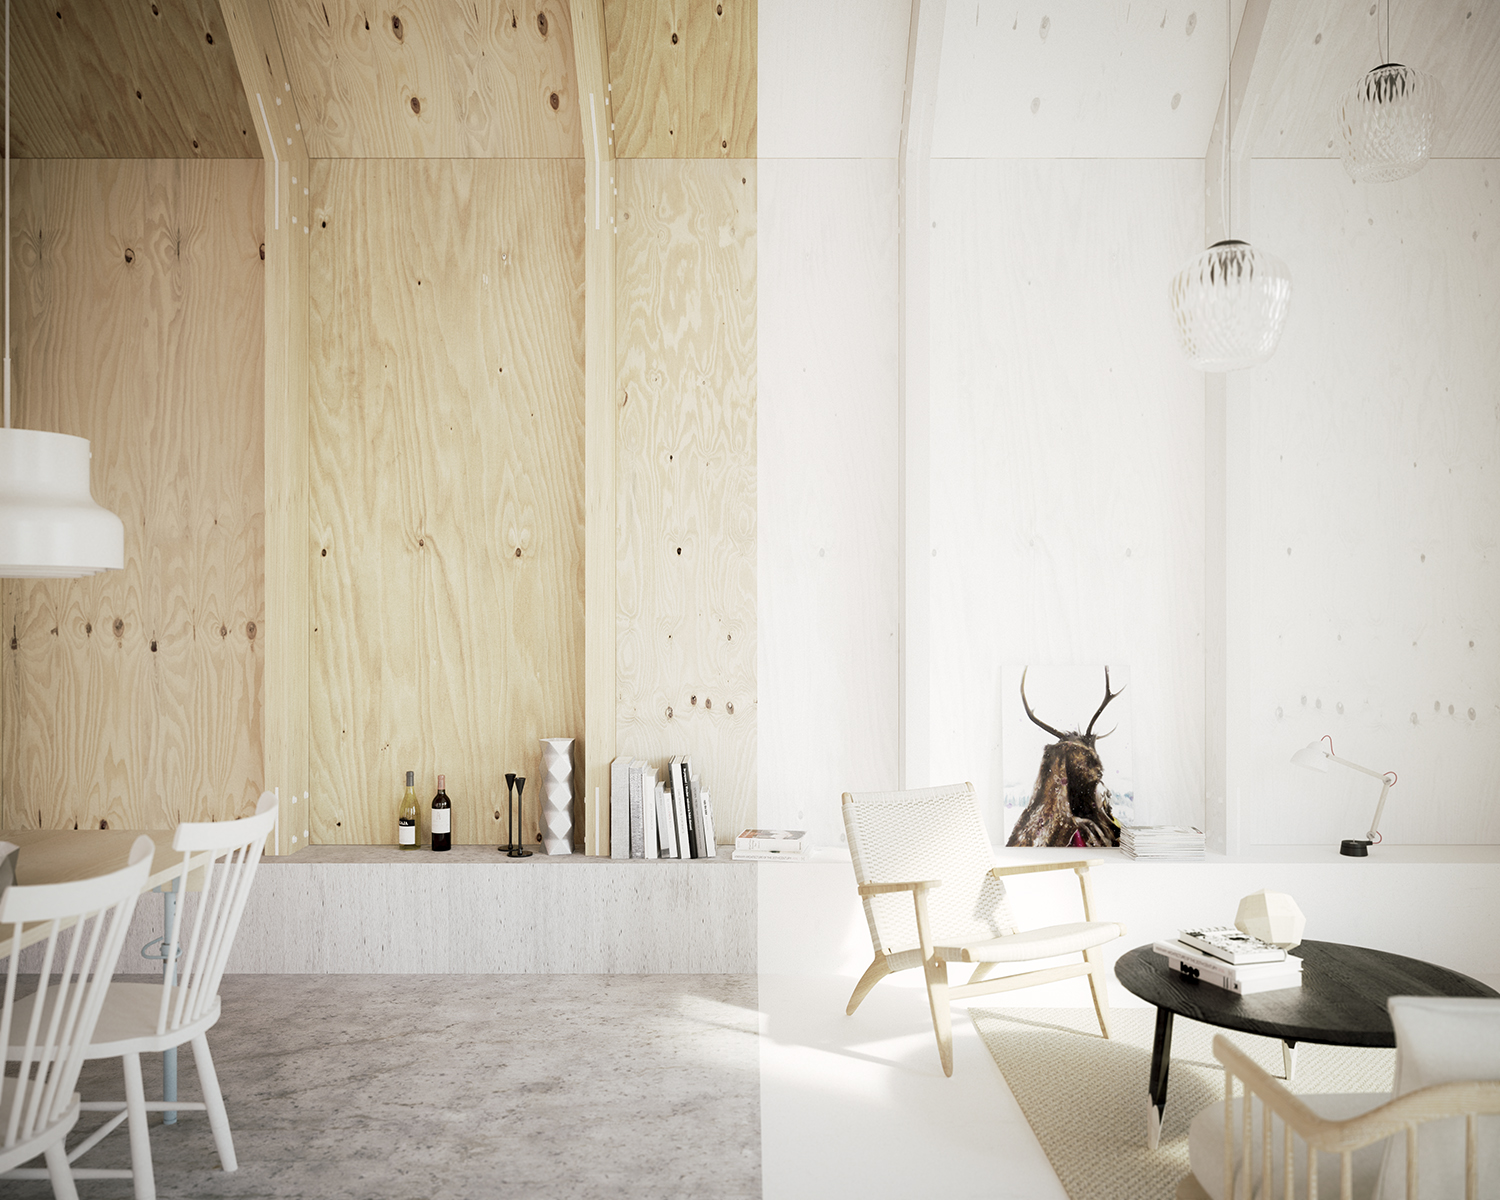
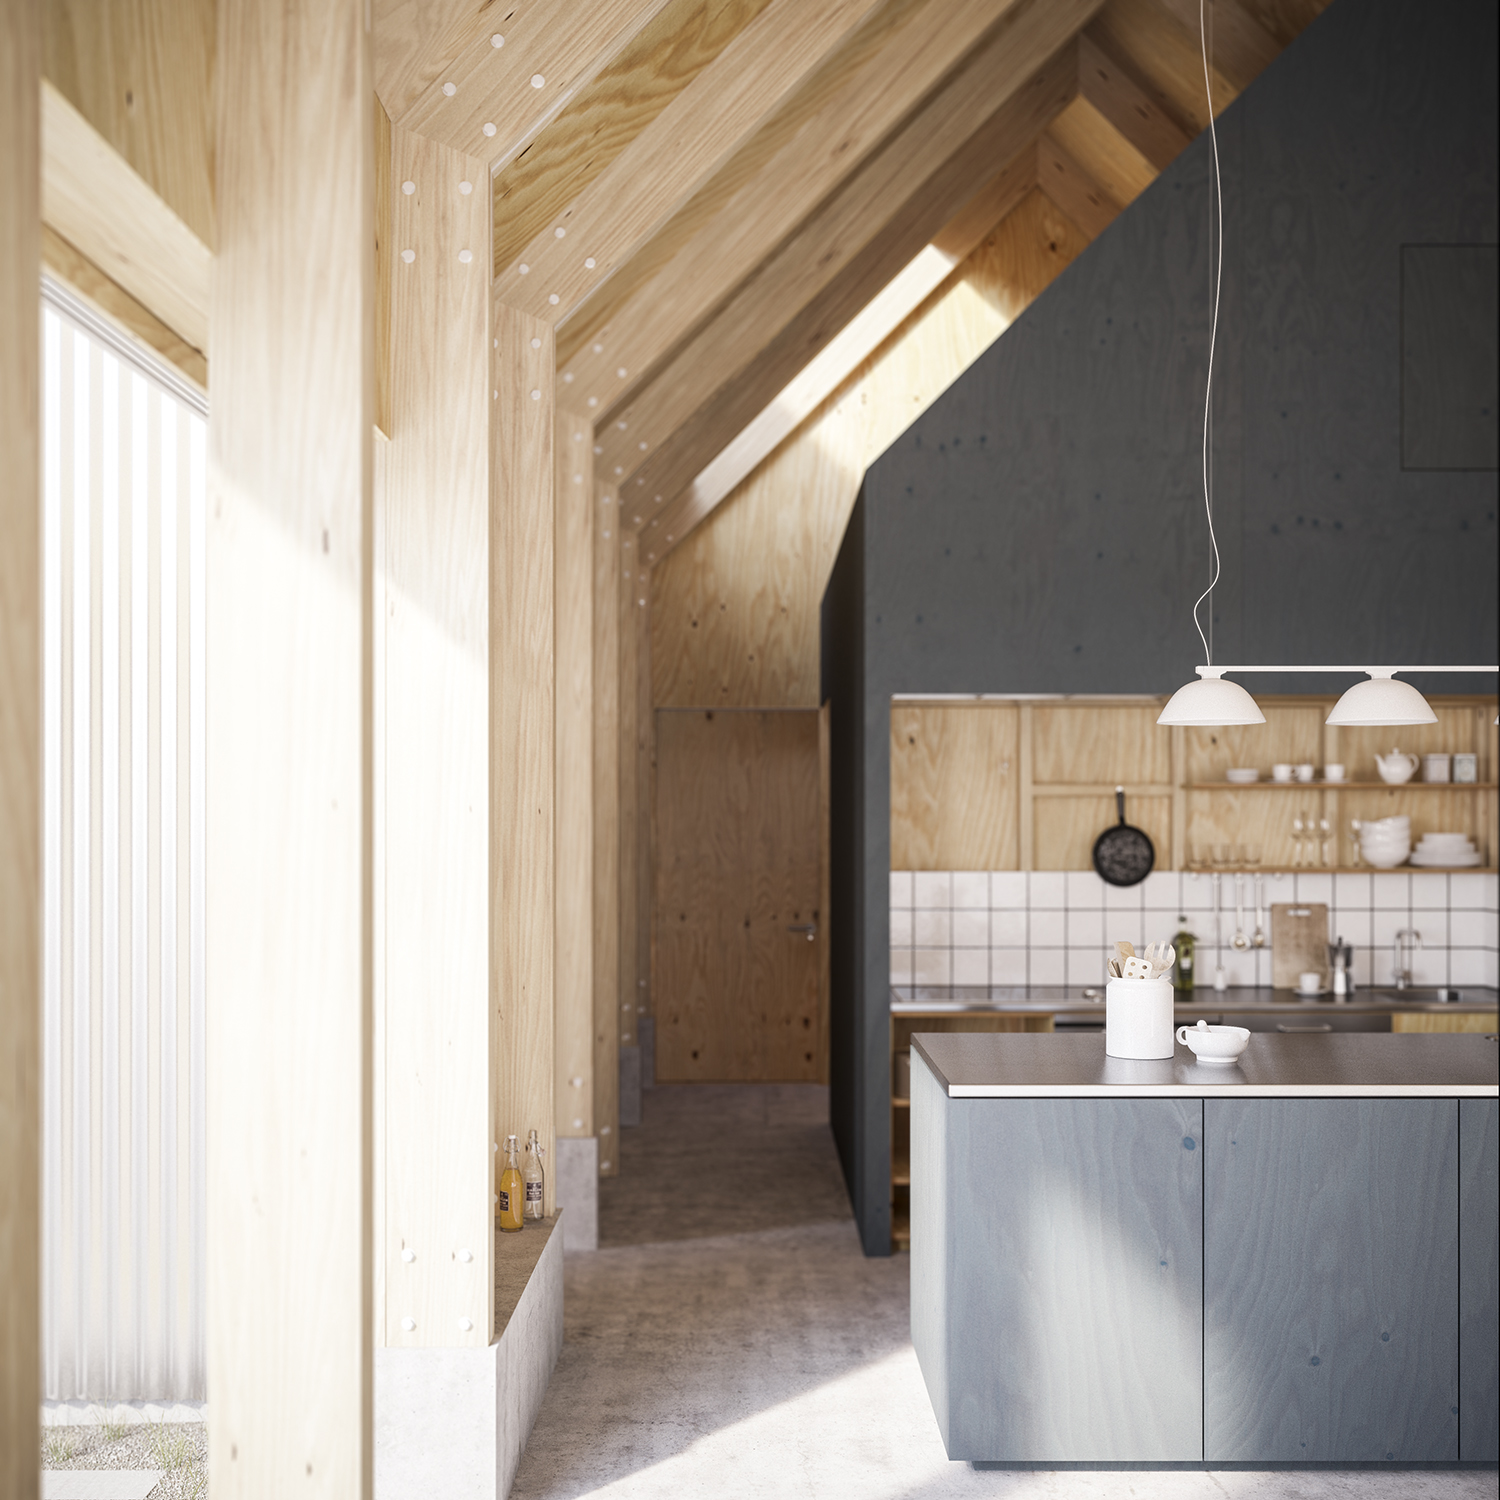
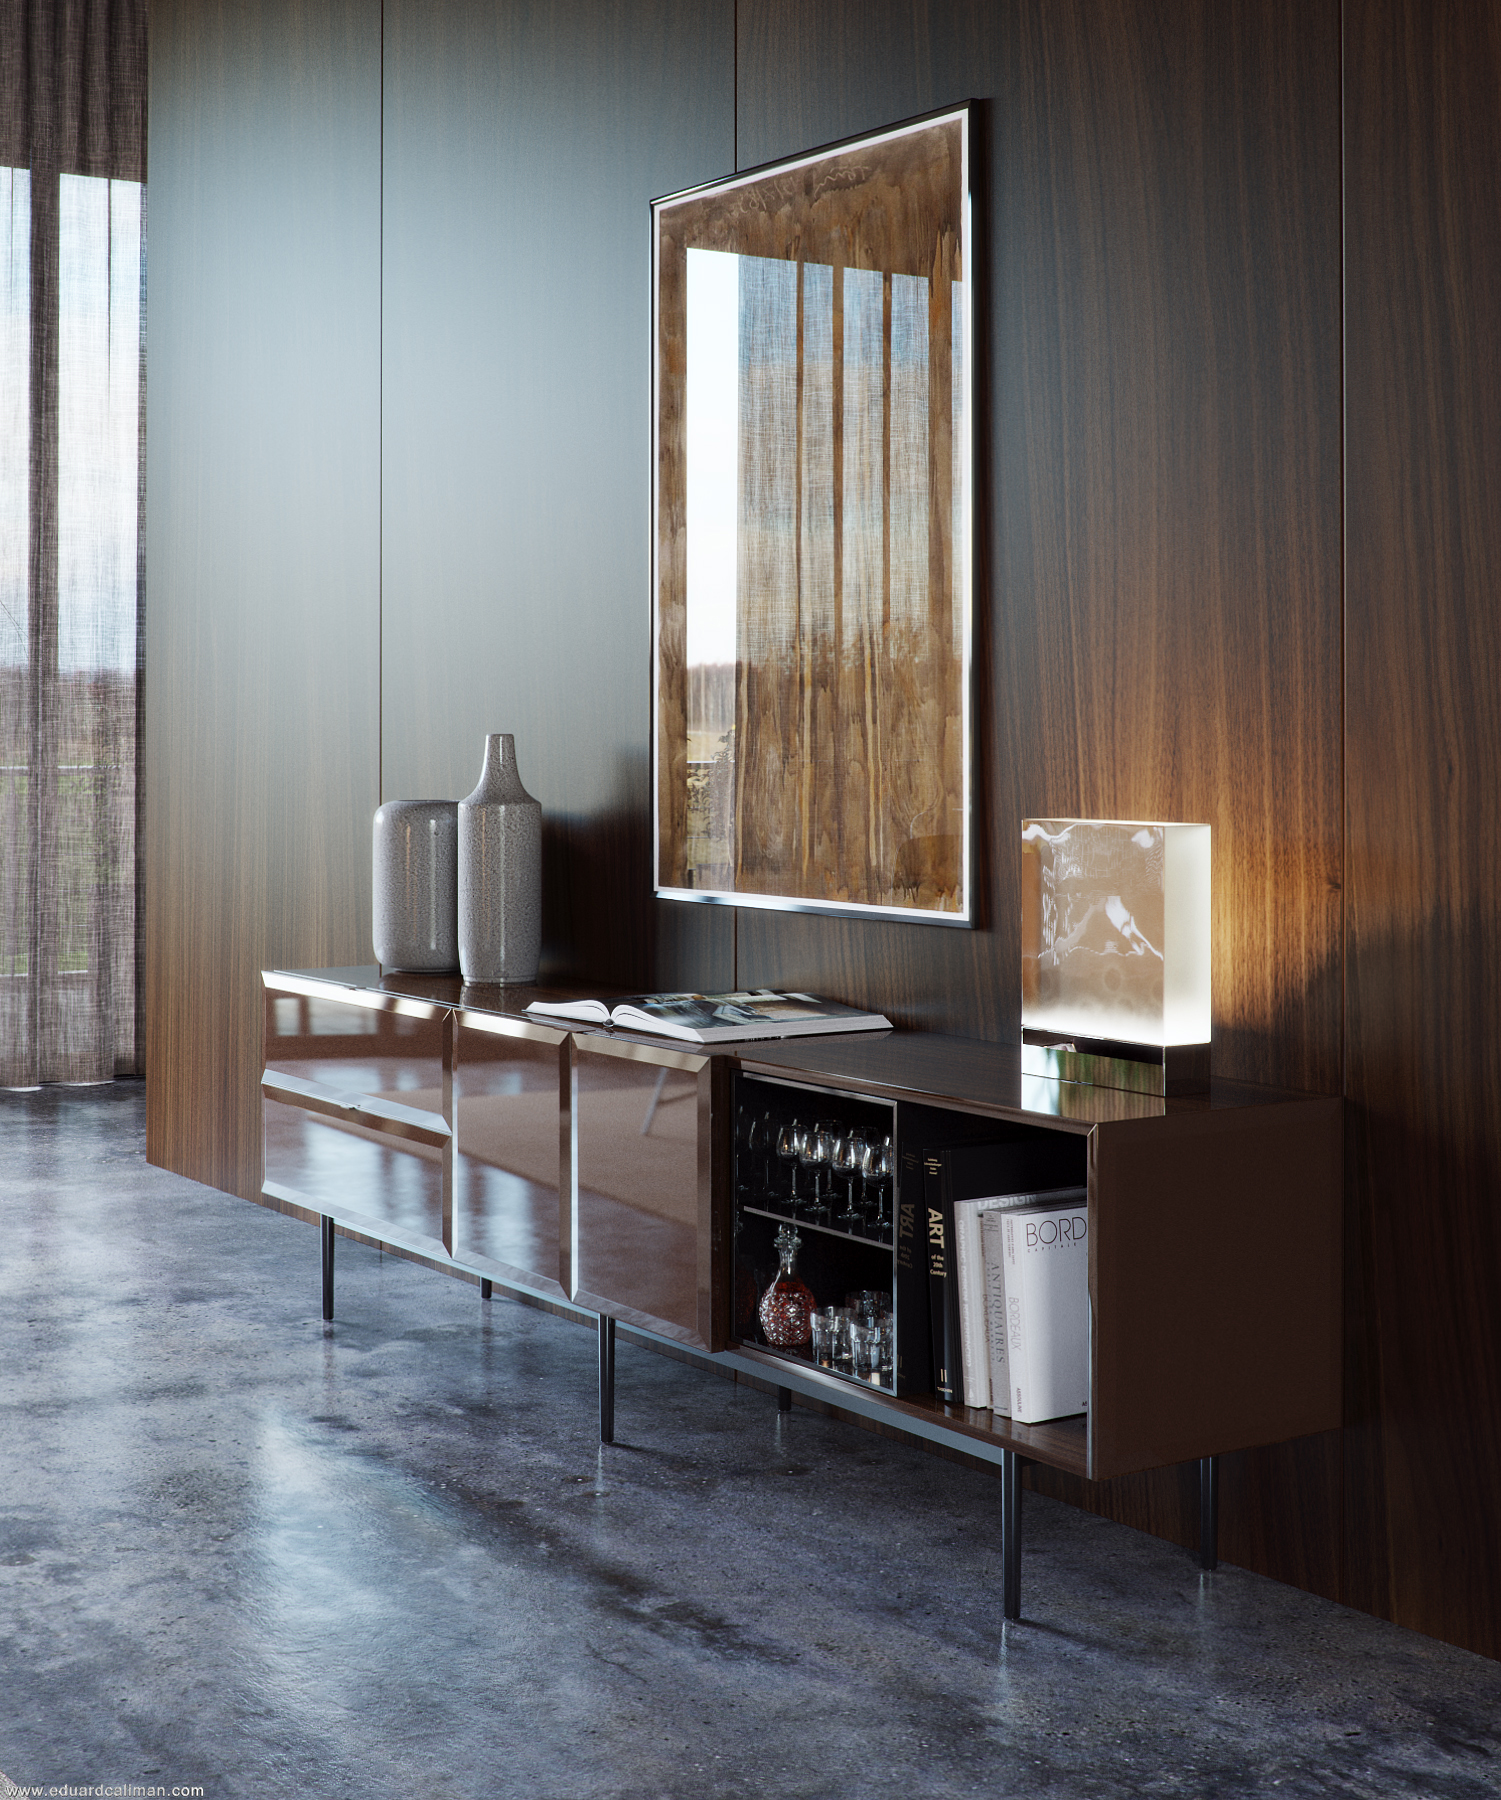
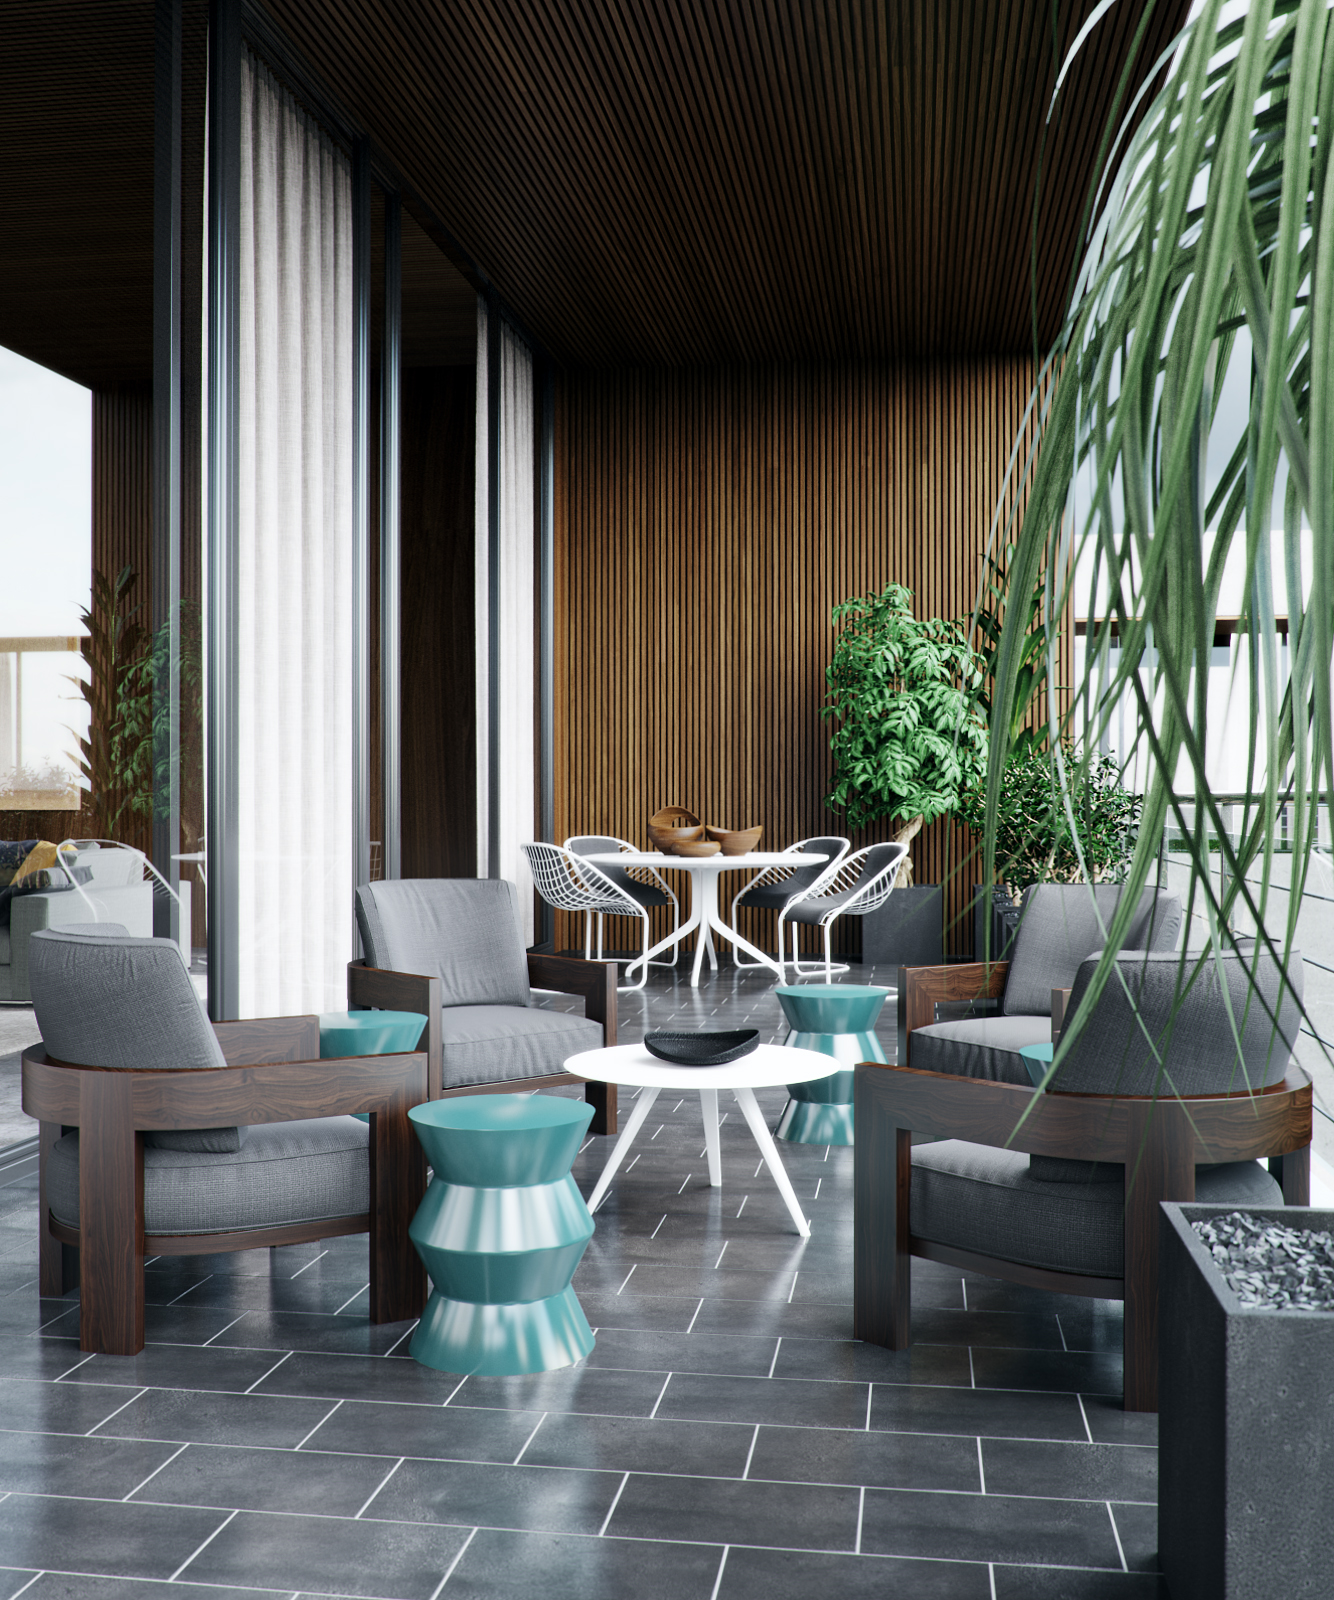
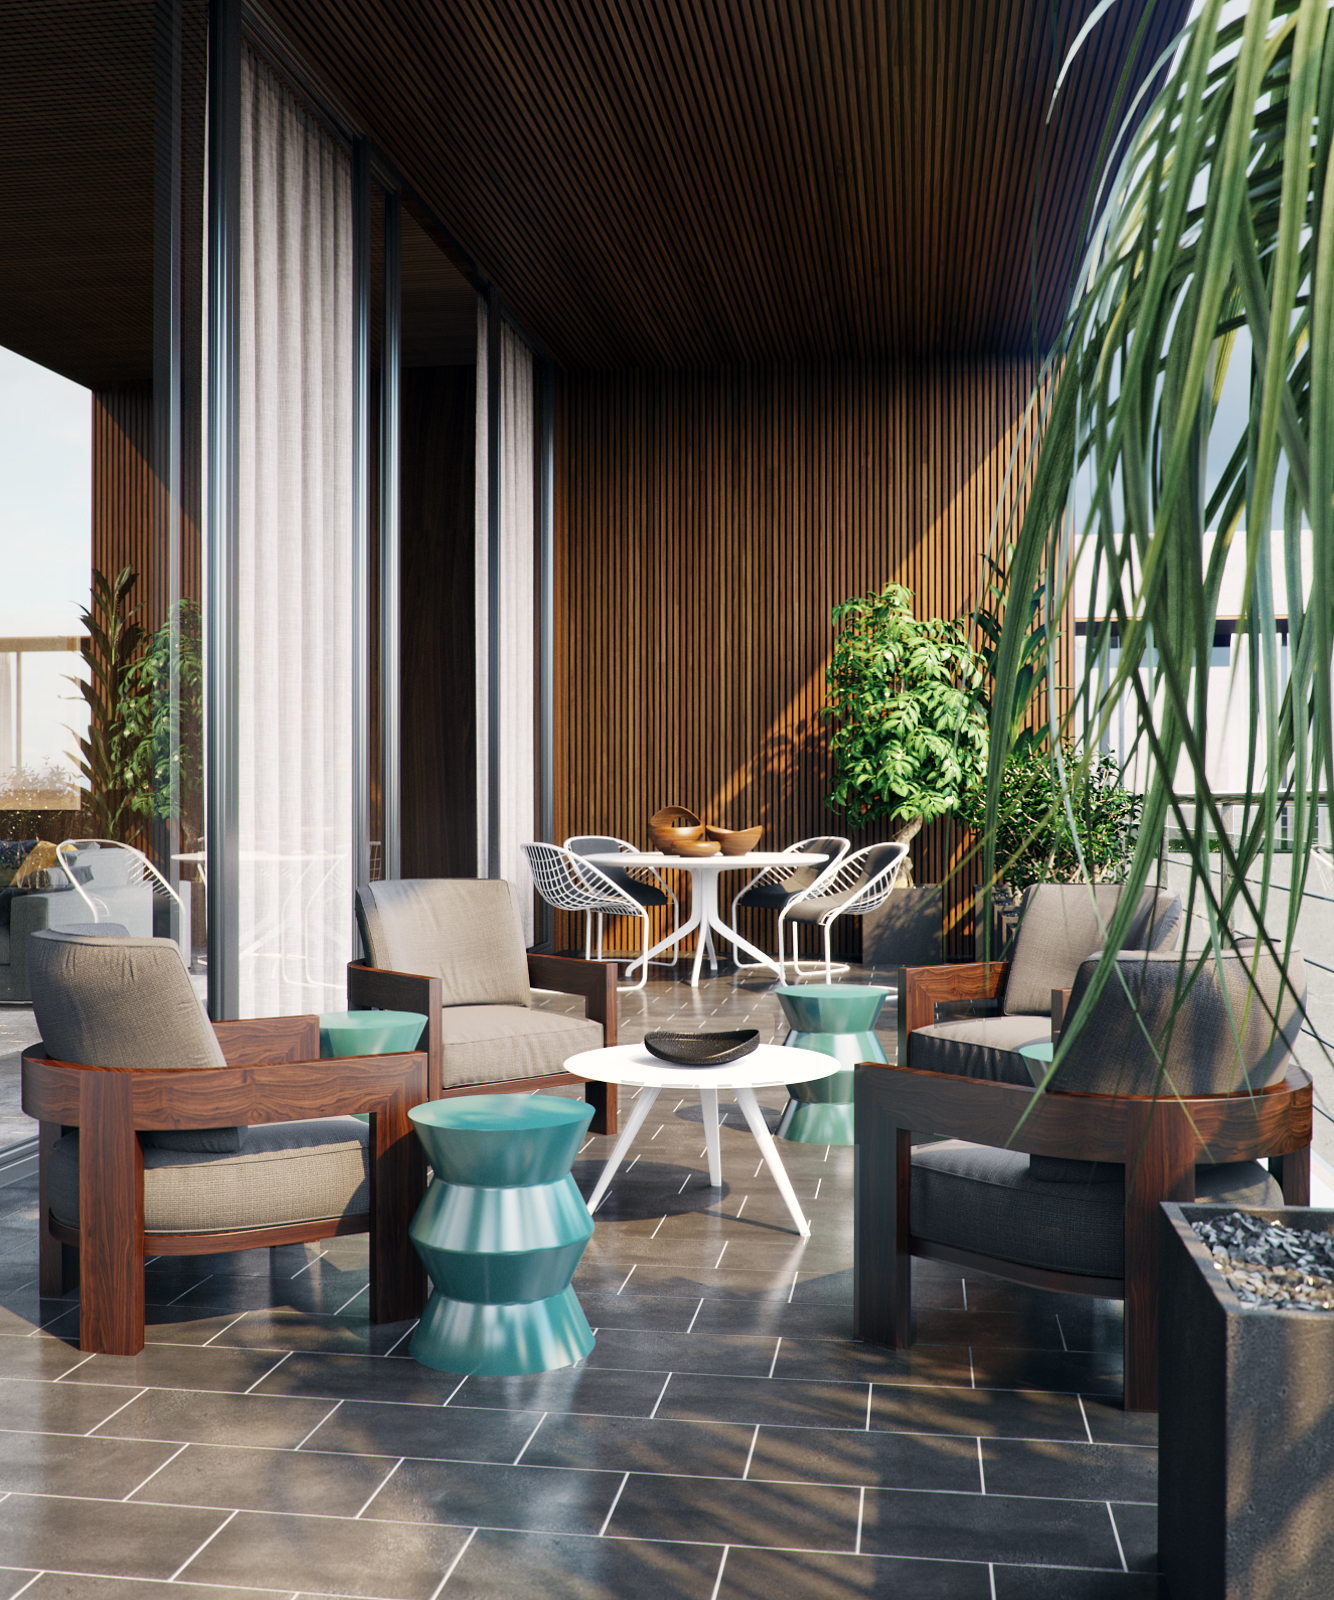
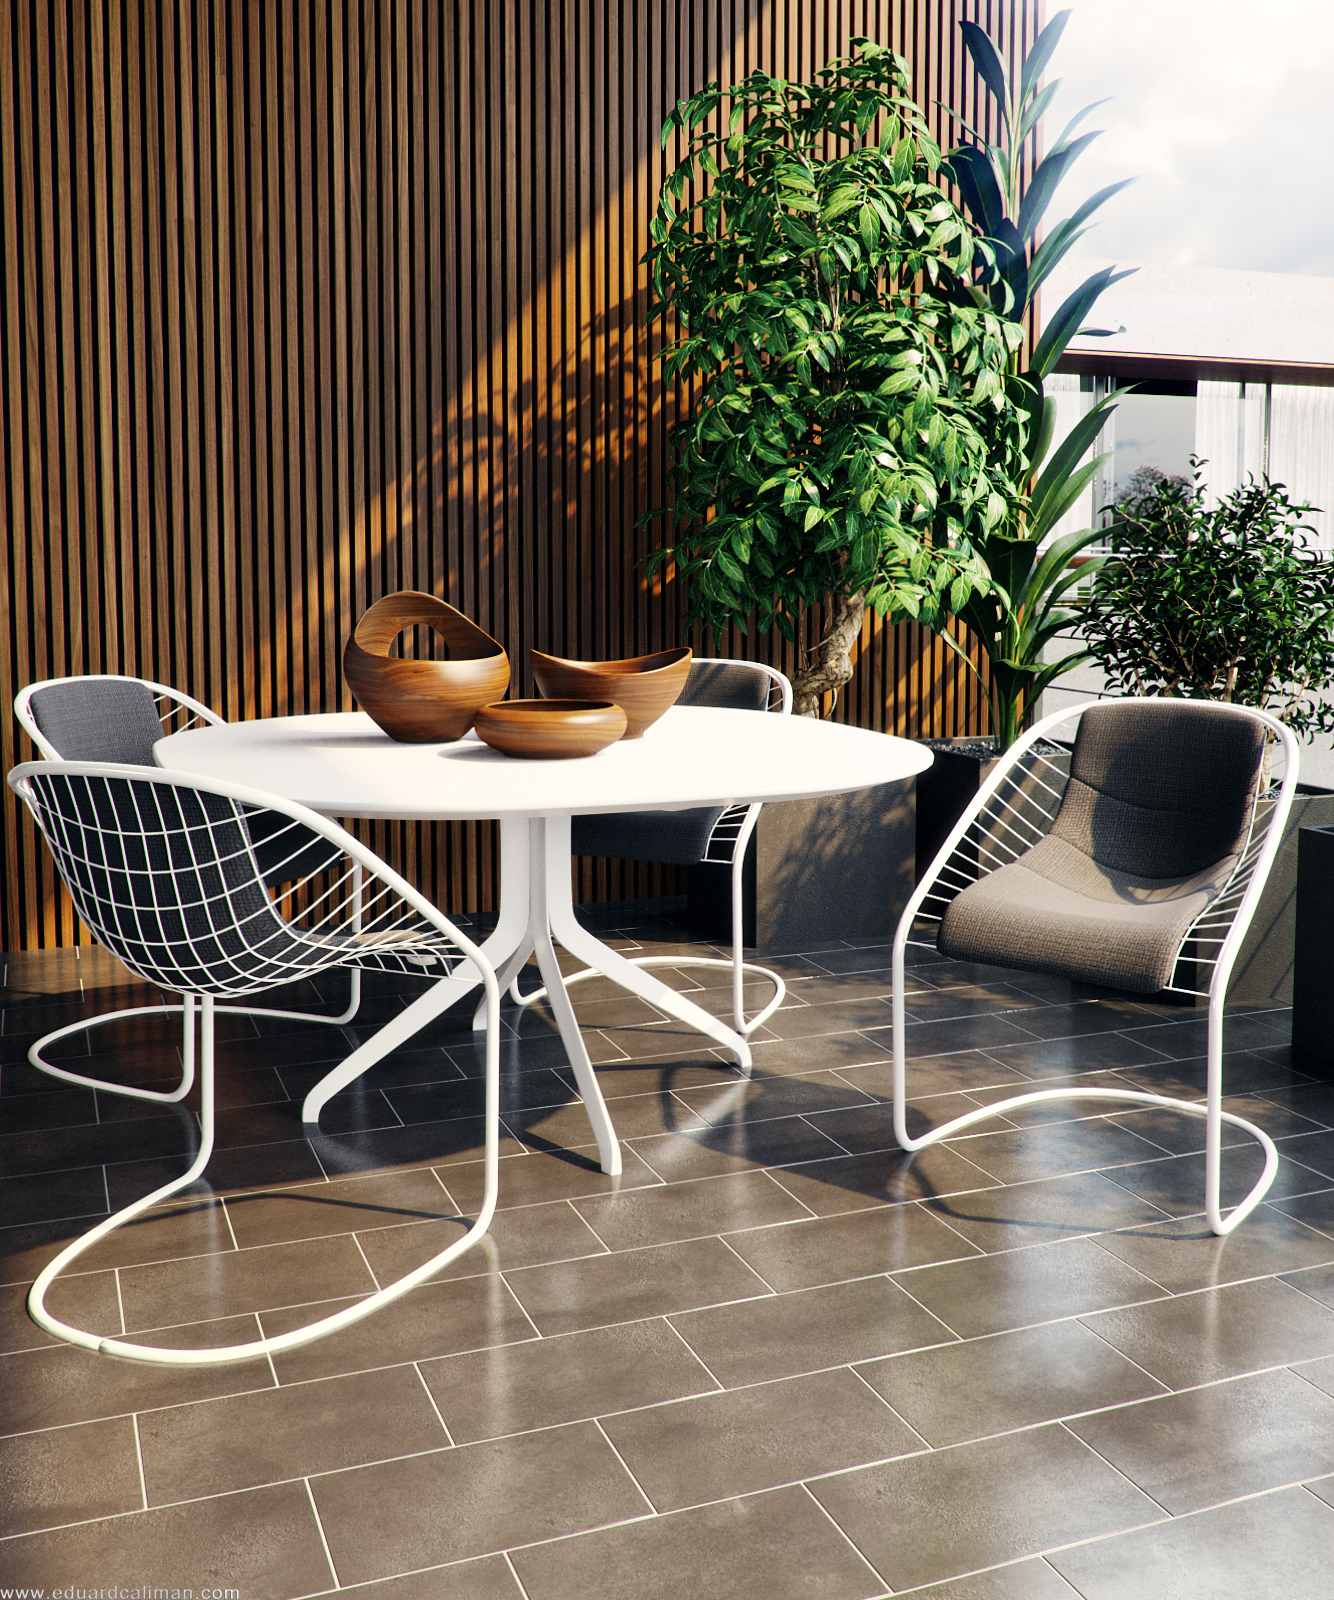
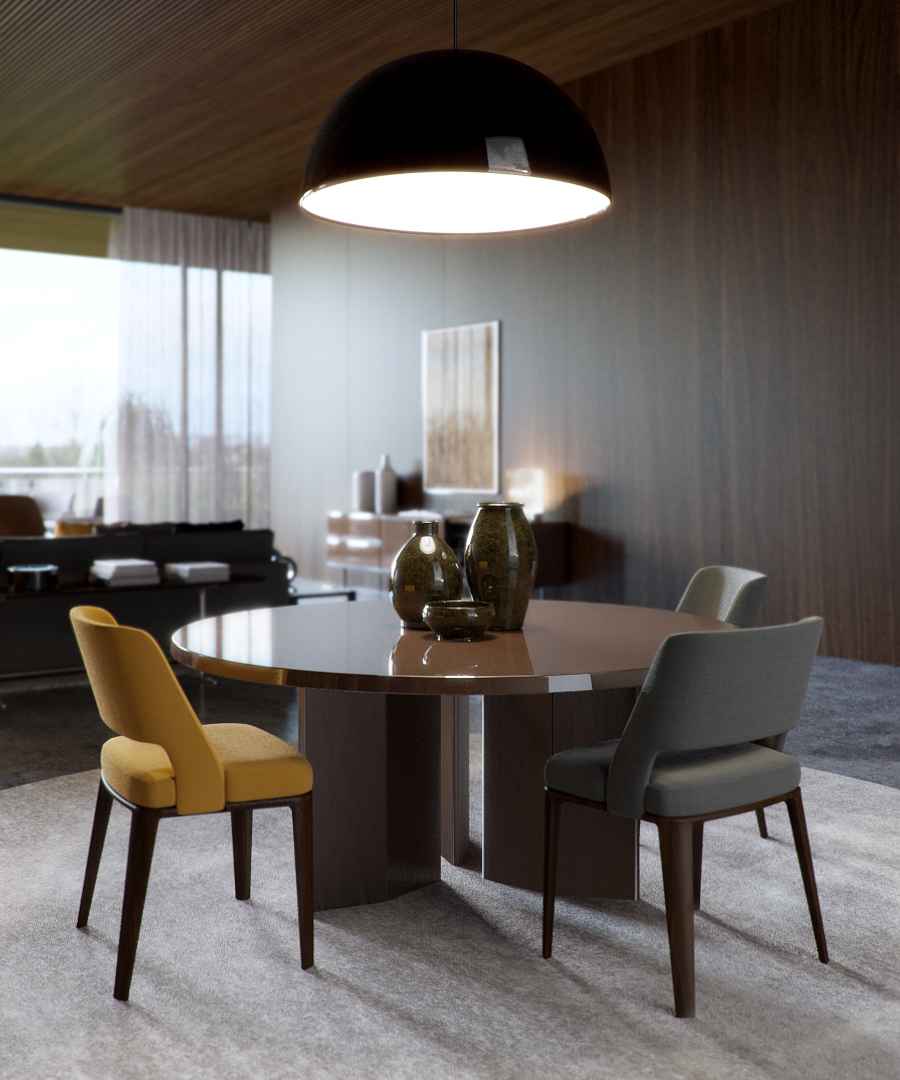
These renders by Eduard Caliman caught my eye recently. A very sophisticated look which is hard to pull off. Great lighting and materials and all done in Corona Renderer which makes it extra interesting for me.

Here are a few notes from Eduard on how he did it:

After I had decided upon and set up the initial space I added temporary placeholders which allowed me to have a bit of detail when testing the lighting. I always like to have visibly some nice results when doing tests, that way I am compelled and inspired to keep on going with the project and also that is why I usually take care of the lighting and materials at an early stage.

Lighting

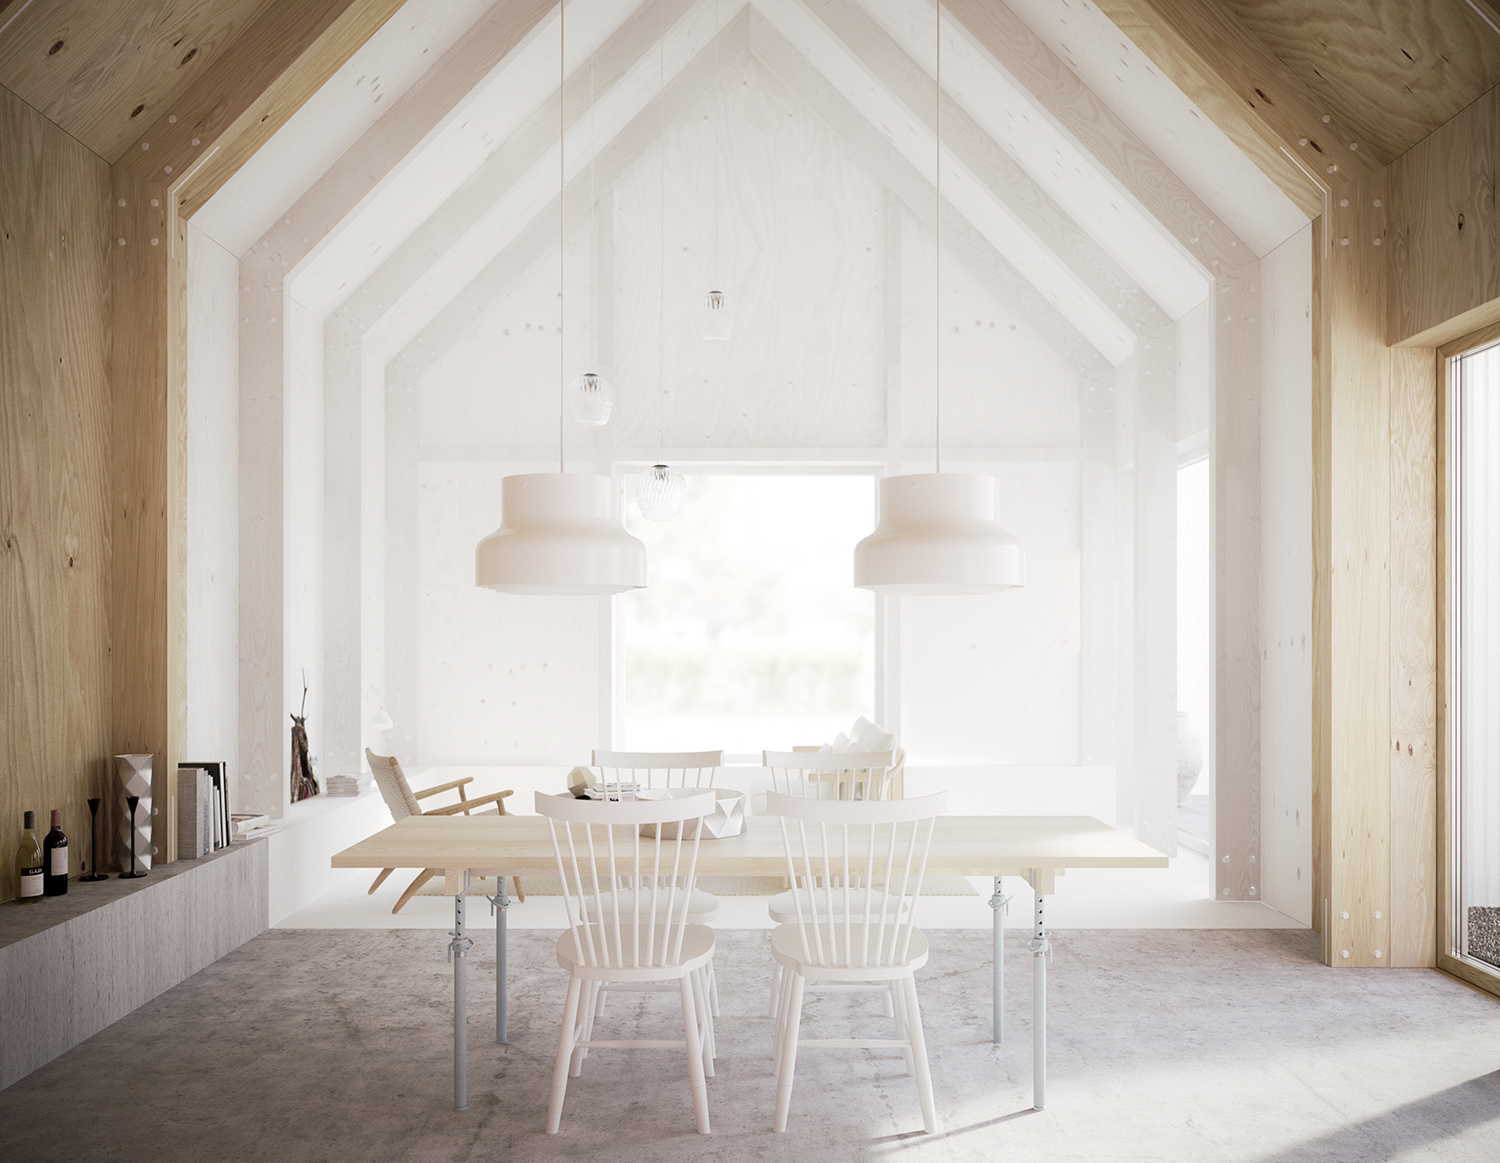
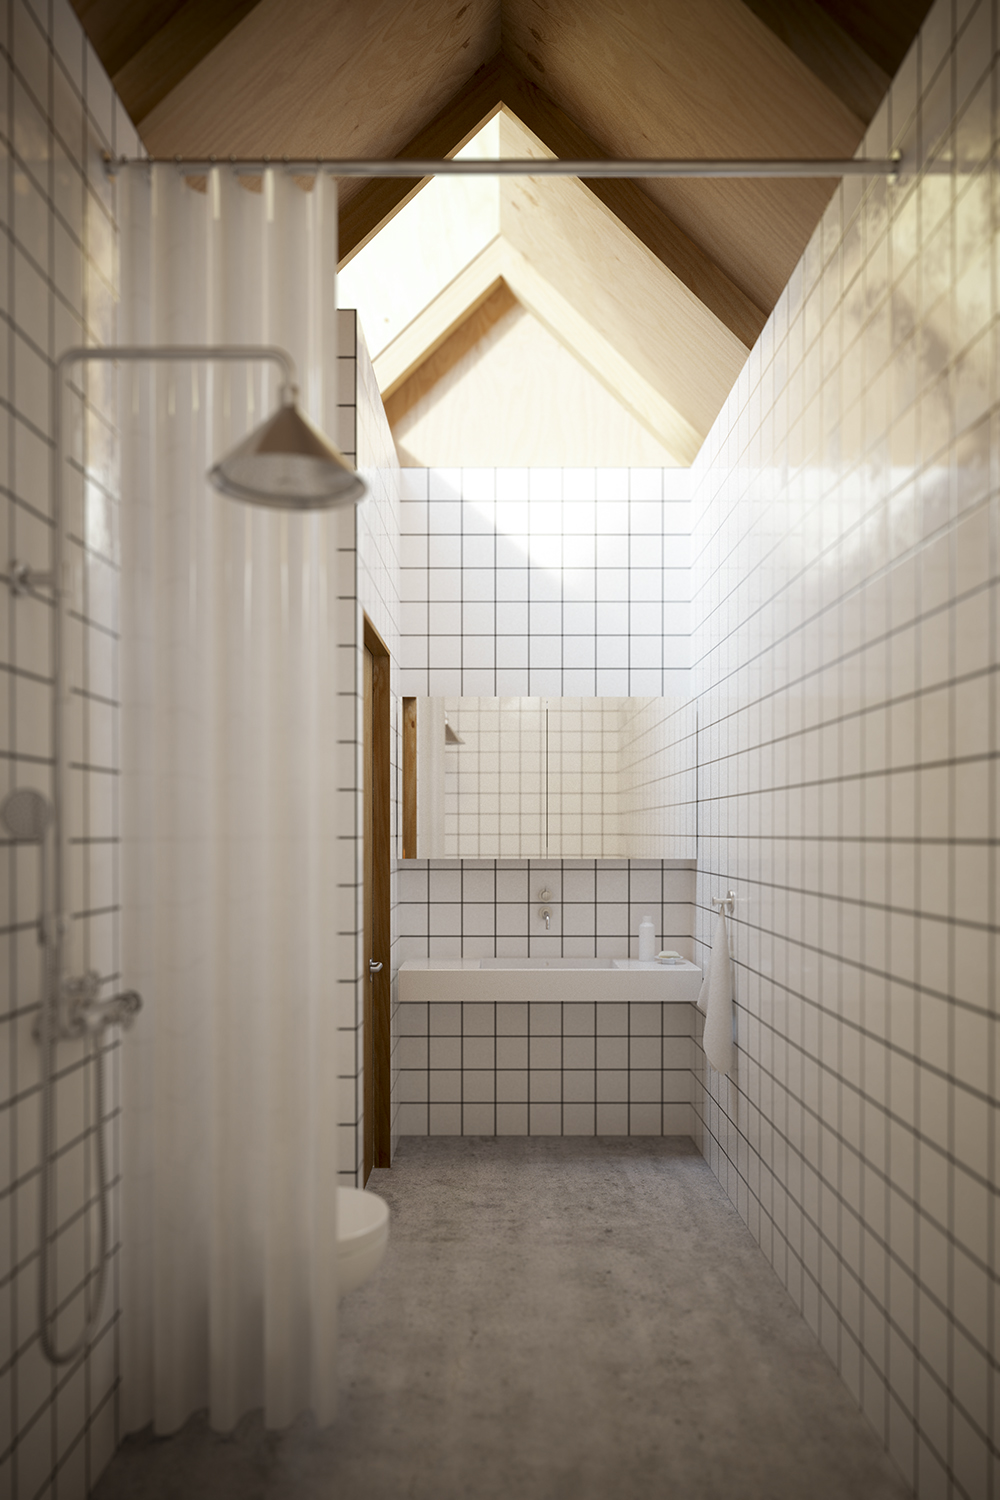
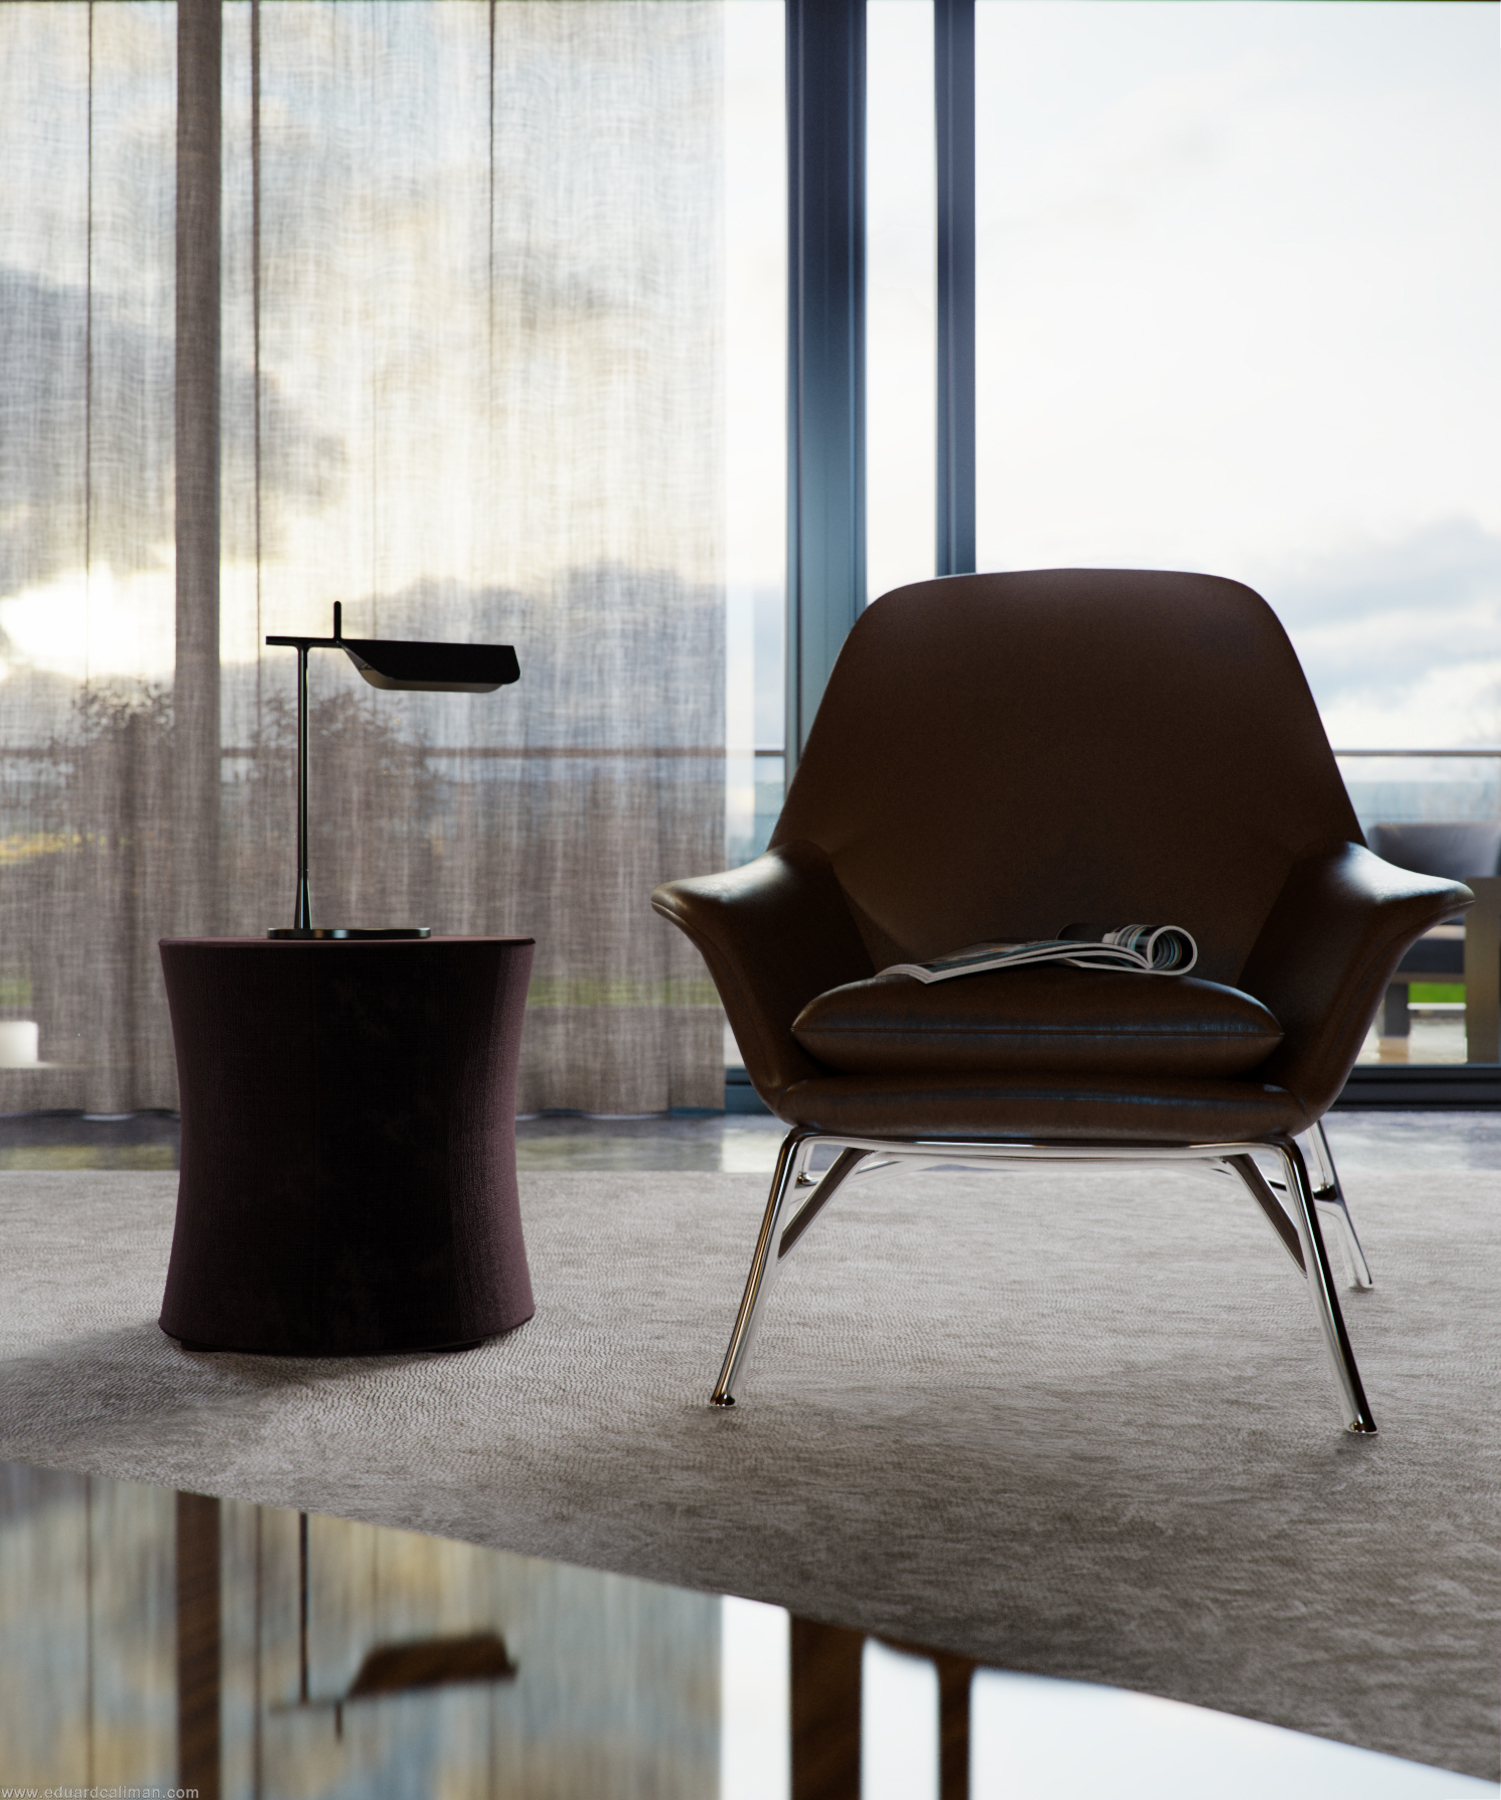
I knew from the get go that I wanted an overcast feel to the interior, and that is why I chose one of Peter Guthrie's great set of HDRIs. For this particular project I chose the 1313 Cloudy HDRI which worked out perfectly, I only fiddled a bit with the rotation of it just to get the shadows as I wanted them to be but as far as illumination quality it was ideal.

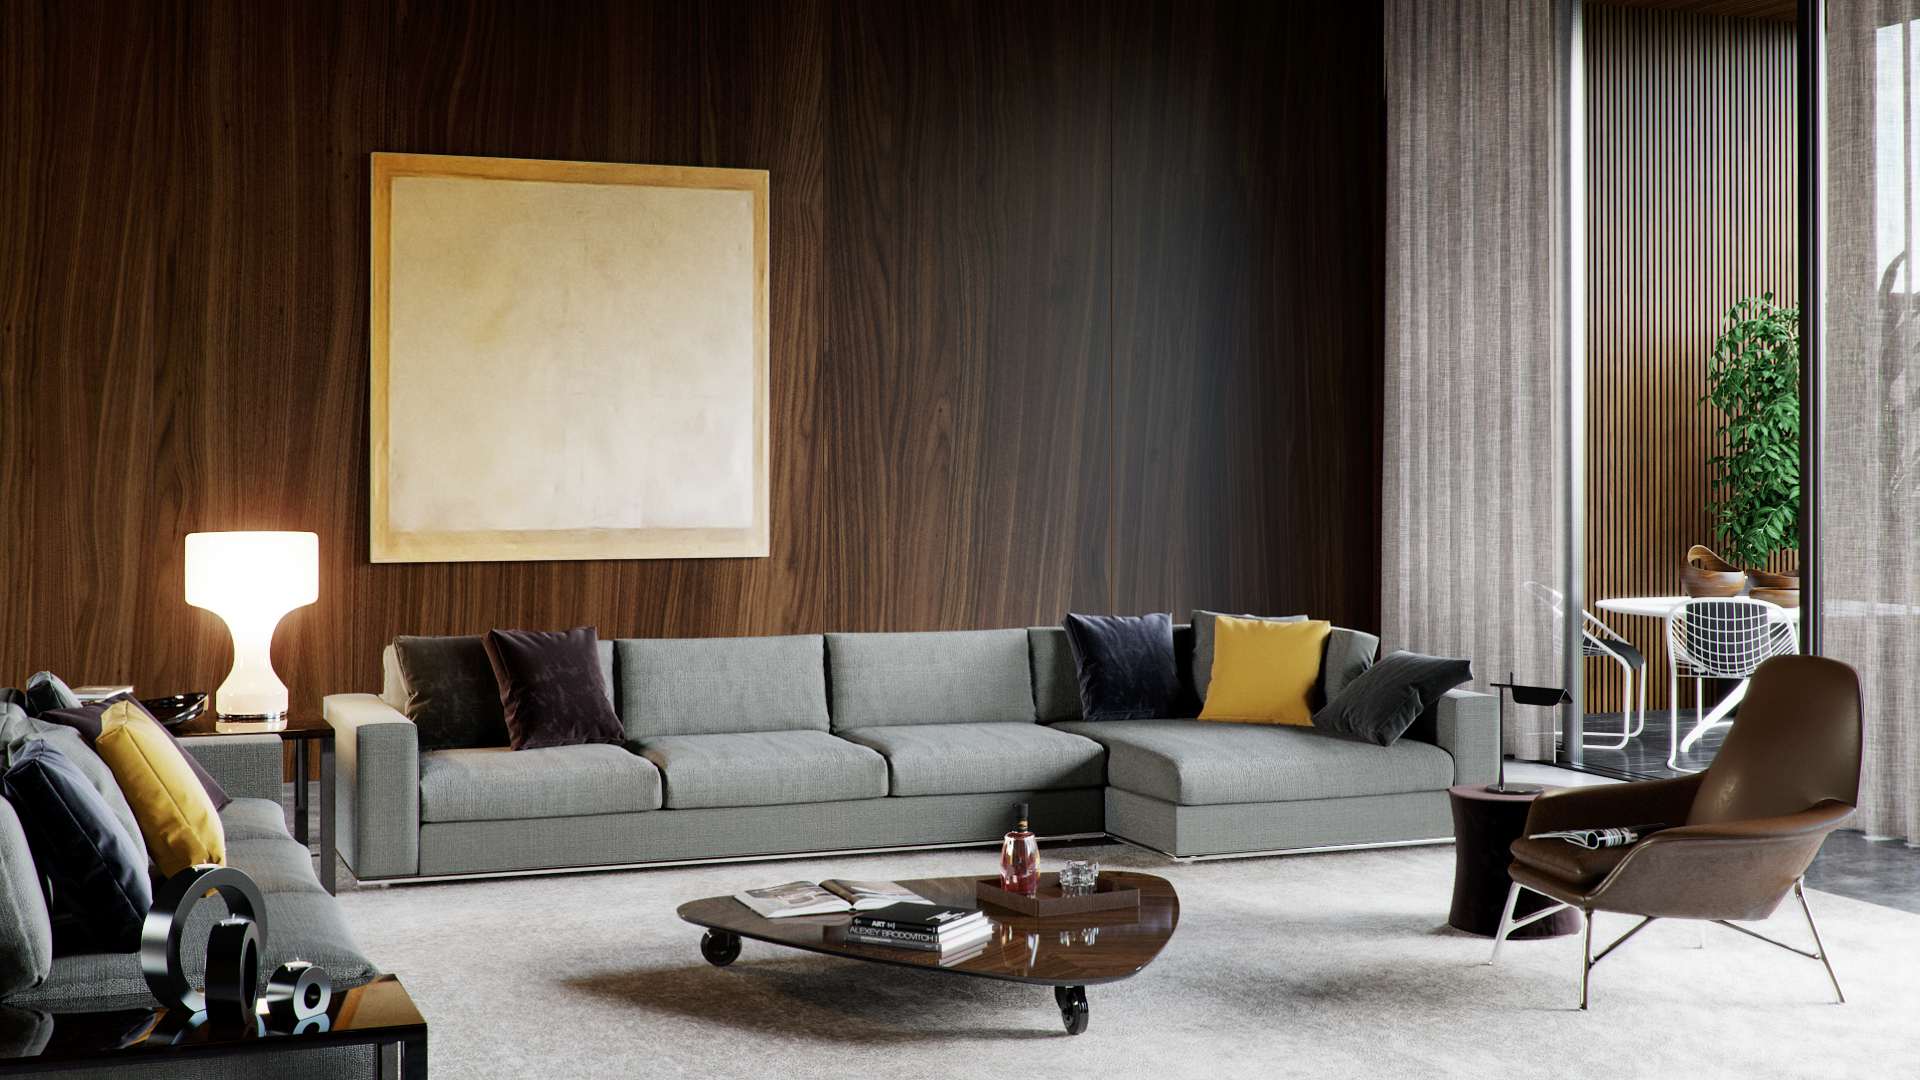
For the sunny balcony shots since you don't see too much the sky I kept the same HDRI but added a corona sun and that was it.

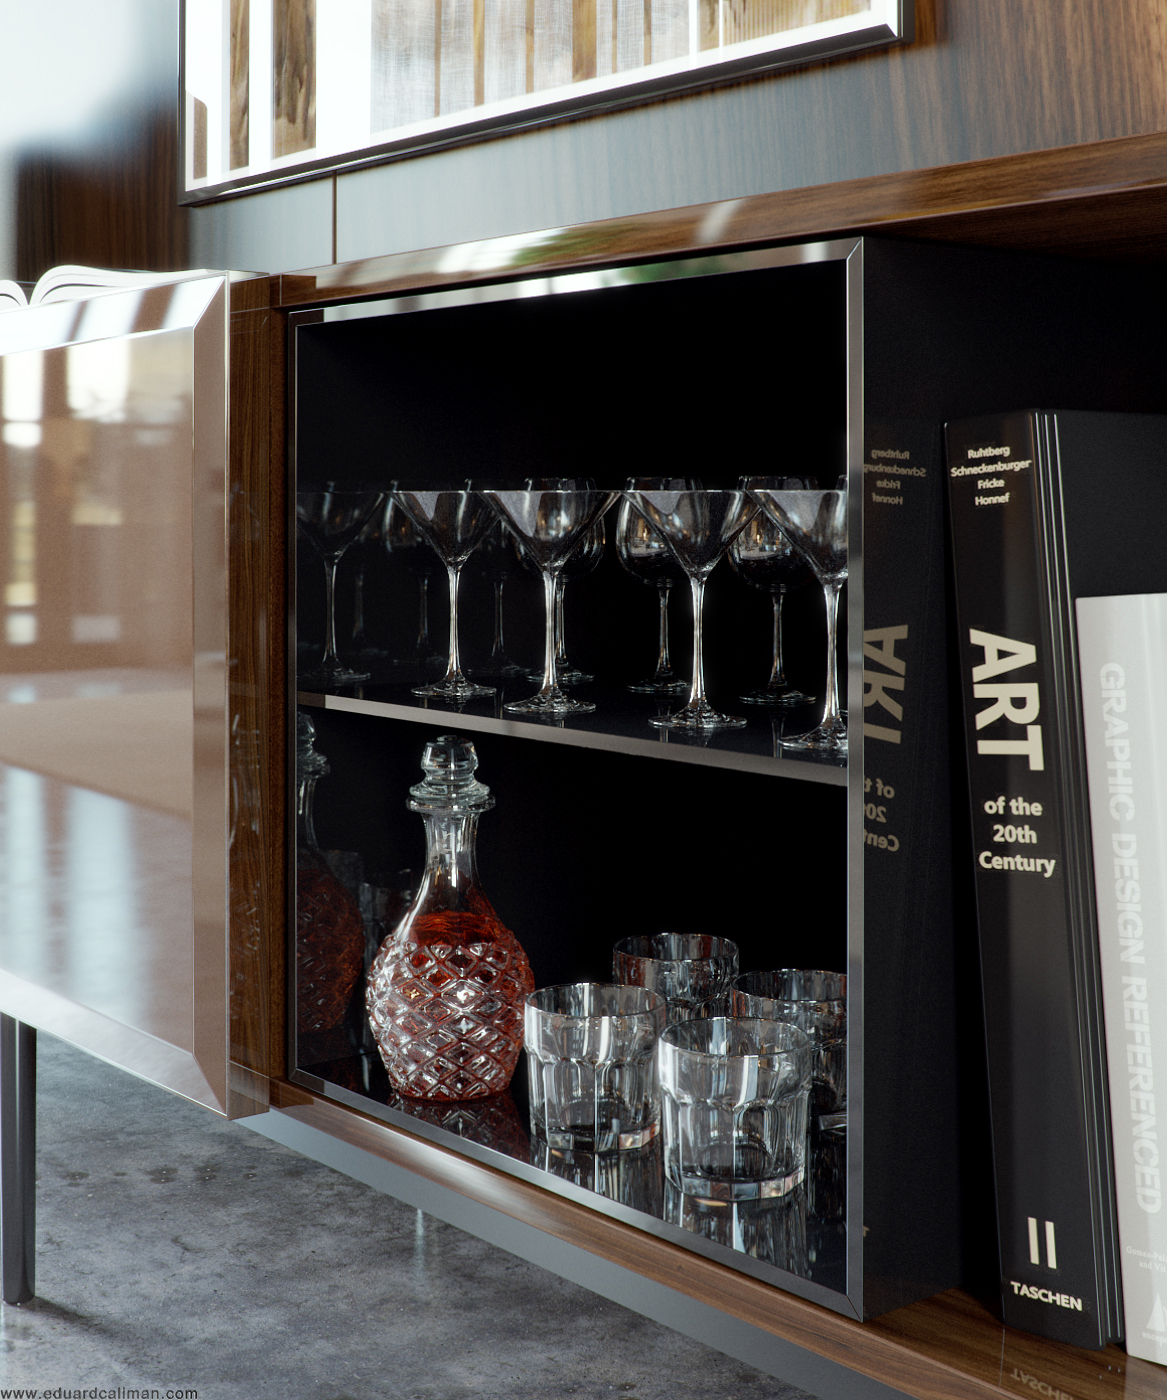
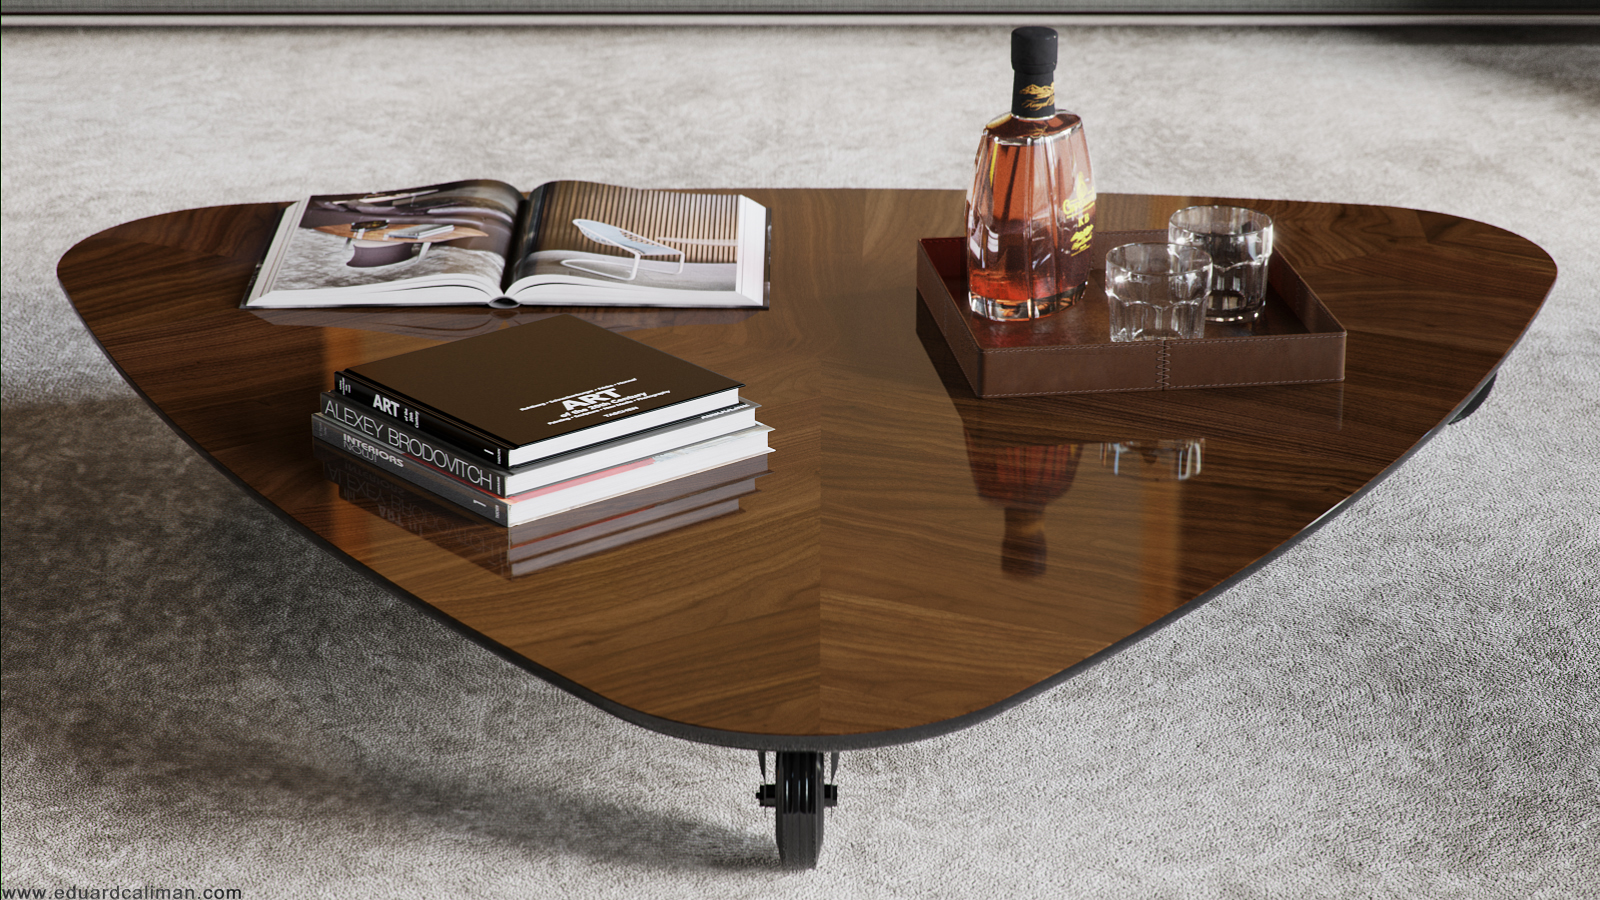
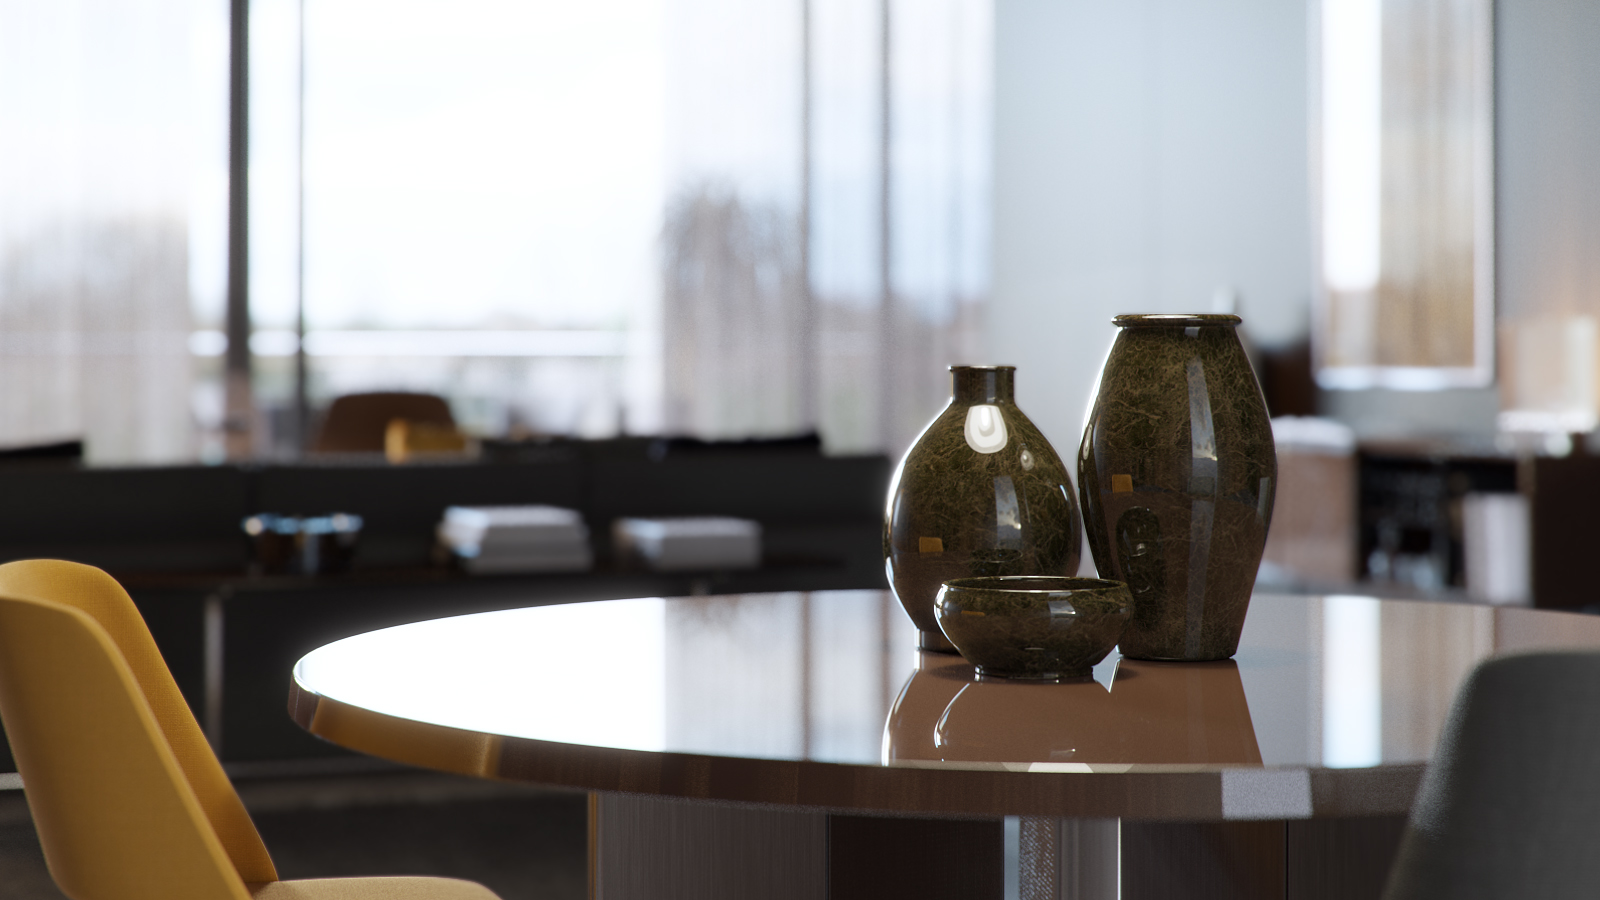
he material creation process was quite simple actually and not a lot of complex shaders were created. will say a few words though on the cushion, concrete and rug materials.

Cushion material

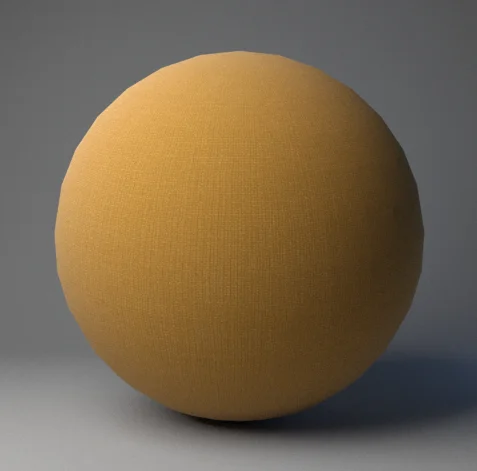
What is more interesting about this shader is the way I used the fallof map. Whenever I create a fabric material I usually do it this way: I plug in the base map in a composite layer, and I duplicate that slot. I will then colour correct the second slot and modify the gamma of that map, I usually raise it to 2/3 depending on the map. This will give me a darker map and a brighter map, I then add a fallof map in the mask of the brighter slot. Now, usually a fabric material has some imperfections on its fallof which is never perfectly shown; that is why I add a map on top of the fallof to show or hide some of the fallof effect, in the screenshot I will post below you can see that I have used that particular map in screen mode (3% opacity) to do just that, to use the brighter values of the map to add some brighter spots on other areas of the fabric. Some other times I also use the bump map in multiply mode to remove some of the fallof effect. 

Concrete material

To get to the bump map of a texture what I usually do is desaturate the image and then apply a Levels correction similar to the one below. Note how the sliders are placed at the beggining, middle and end of the colour information inside the histogram, that way one creates a texture that is easy to manipulate in 3DS Max using the various blending modes in the Composite map (usually Multiply and/or Screen in my case) as you will see below. A good advice would be not to go over the information in the histogram too much so that you don't clip and lose valuable colour information.

Rug material

A very simple one, the prerequisite here was to have good enough maps. The settings were very simple, bump at 1 and that's it.

I hope you enjoyed this explanation and if you have any questions feel free to ask and will try to reply in due time. 

Check out Eduard's website here and also a reminder that my shop is now open!

GPU maintenance

Super geeky entry under the category 'PG Tips' here, but might be useful to someone... 

I noticed my GPU was running really hot (over 90 degrees idle) so decided to open it up and see what was going on. Due to a not-very-clever design, dust was completely blocking the path of the air over the heatsink. If you have a similar graphics card, might be worth investigating!

Or if you can't be bothered going to such lengths, I would still advise downloading GPU temp or similar to check if it is overheating. (my temps dropped 15 degrees once i had removed the dust)

Online Shop now online!

Finally, after a LOT of work and about 6 months later than planned, I'm happy to announce that my online shop is now open for business. Next project: finish the 2nd series of skies...

The little things.. and being able to find them

I *think* I have managed to finally incorporate a search function in this blog, AT LONG LAST! The squarespace search function is a bit weird in that it brings up a lightbox/overlay type thing, but otherwise it seems to work pretty well (it works on my iphone too but is a bit fiddly).

So to find that tutorial on using vrayedgestex to break up a rough concrete edges, just type vrayedgestex and you should find it!

OH, and you'll find it lower down the sidebar to the right >

Vray 3 new features part 1

A good example of where the new 'Max Ray Intensity' feature in Vray 3 can come in handy. In the render below you can see the dreaded 'fireflies' or 'speckles' that often plague vray users, especially if using a hdri sky (you might need to click the image bigger to see them). 

render 'A' - settings as they were for vray 2. render time: 7 mins 31 s

fireflies!

Simply turning on max ray intensity (MRI from here on) removes these fireflies from the main render (reflection element included above as it is in the reflections that the fireflies occur). You can also see that vray isnt havent to work as hard from the sample rate element and so it is noticeably quicker into the bargain.

The only time I have found that having MRI on can slow down a render, is when doing particularly hard to light interiors where there is very little light bouncing around. In those cases vray seems to perform better with it turned off, but otherwise I would recommend you generally leave it on by default.

render 'B' - turned Max Ray Intensity on. render time: 6 mins 49 s

Below is the same scene but with embree turned on. A small percentage gain, but again, I mostly leave embree on by default these days.

render 'C' - turned Embree on. render time: 6 mins 29 s

Preparing textures in Photoshop

I have a mini tutorial on flickr somewhere on preparing photographed textures for use in 3d applications but can never find it so thought I would write it up properly for the blog.

These days I mostly take photos of individual textures rather than a whole wall or floor as there are so many great plugins like mightytiles, VP walls & tiles and multitexture that can take care of the randomisation for you. It makes the initial process of capturing the textures a lot easier for sure.

photos taken in a bit of a hurry as I had raised the suspicion of several security guards...

First thing I do is to run the photos through lightroom and make sure the color balance is the same on all raw files. Then I use the automatic straighten to try to square up the photo or the manual perspective tools if that fails. I then crop in lightroom and sometimes use the spotting tool to get rid of unwanted imprefections. Note that the colours are still a bit wild due to the uneven lighting, that can be fixed later.

In fact the camera's auto white balance probably did a decent job in retrospect, but if you are in a more controlled environment its usually a good idea to set the white balance manually in LR.

photo as shot

perspective quickly and roughly fixed to maximise the texture area

In photoshop, i then open the TIF that I exported, duplicate the layer for comparison purposes, then do a high pass of about 100 (radius) on it.

Filter>Other>High Pass

IMMEDIATELY after doing this, go to Edit>Fade High Pass change the mode to Luminosity and leave the opacity at 100% and hit OK. This brings back some of the colour info from your texture.

If at this point you are making a seamless texture, then you would use the offset filter (Filter>Other>Offset) and offset the image half of the resolution to the right and downwards, then tidy up the seams using whatever means you prefer.

Usually I am trying to match reference images for materials so a useful trick to get the colour right is to use the match color tool

Image>Adjustments>Match Color

and then select the source reference image (open it first in photoshop) and adjust the sliders till you get a decent match. Even if not matching a specific reference image, this step is great to make sure all your textures are harmonious in colour.

That's about it! Usually when making a Mighty Tiles texture I'd try and have 8 or more fairly high res textures.


PS. I have tried every seamless texture maker plugin going and never really liked any of them. Same goes for bump & normal map making programs. I always get better results taking my own photos and then trying to come up with a clever way of making a displacement map for it, if needed.