
Don't let anyone tell you sketchup is not a 'serious' modeling program and that it produces untidy geometry, like any program its how you use it that counts. The genuis of sketchup lies in it's tidy interface, brilliant snapping, and ease of use. Sketchup has it's limits of course, but for architectural visualisation I think it is the perfect tool for modeling. Every single project in my portfolio started life in sketchup. The start of any project for me is understanding the building and modeling it - as quickly and as efficiently as possible. This timelapse screen recording shows the whole process, speeded up 10x. The whole thing took about a day (3 hrs 46mins, excluding all the coffee breaks). I like to get the overall form of the building done first, but identifying and making components for any repeating elements (windows, doors, whole apartments) as I go. You can then go back and add detail later on.
Free texture - expanded metal
Not a new technique, you can find good tutorials by Bertand Benoit and Philippe Steels here and here, but it remains the best way to create displacement maps for repetitive things like roof tiles, metal panels and in this case expanded metal mesh. The great thing about doing a material like this with displacement rather than a straight opacity map is that it looks different depending on the viewing angle, which adds to the realism.
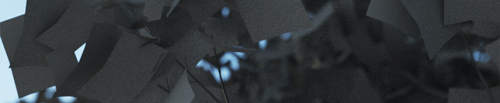
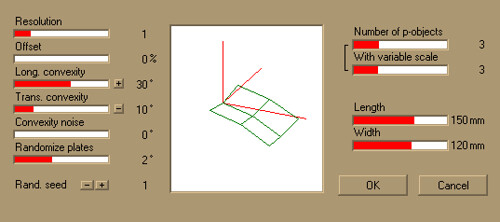
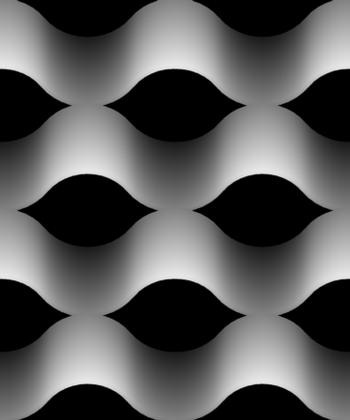
I made a quick model of expanded metal that looks something like this:

then did a quick top-down render and saved the zdepth element as a 16 bit png. Its important to save as 16 bit if you want a nice clean and smooth displacement, 8 bit often doesnt have enough grey levels so you get a stepped gradient which looks ugly when displaced.
This is what the finished displacement map looks like:

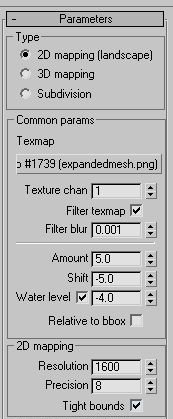
If you use vray, then the displacement settings were (units: mm) :
The actual material settings were very simple, a brownish diffuse colour, slightly more pink reflect colour, ward brdf
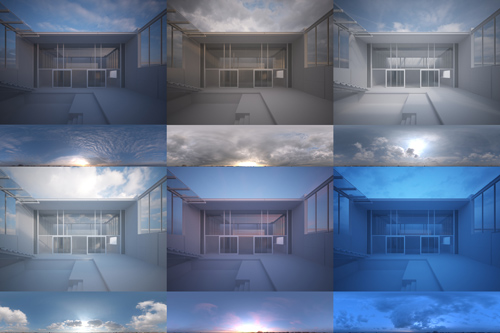
And finally some renders (click for higher res):
Vraysun and HDRi sky tutorial
Occasionally its nice to be able to use a HDRi environment together with a vraysun, for when you want stronger shadows than the HDRi supplies. The trick is in aligning the sun with the HDRi so that the shadows from each match up. You can do this through trial and error, but if you want to change the rotation of the HDRi then its a pain. Rather than try to explain the steps involved, I thought it would be quicker doing a video tutorial. I'm afraid it turned out to be 13 mins long, but hopefully it will help.
The code for the wired rotation is:
radToDeg(Z_Rotation/360)
HDRi Sky Lighting Tutorial
Thought I should do a quick tutorial on how I use these HDRi Skydomes I'm selling. Note that this is just one of many possible workflows, and there are probably lots of tricks I'm missing and even things I do completely wrong. I should also say that I work mostly with still images, not animations.
1. Here is a typical architectural scene. It is a model I made of Waro Kishi's Fukaya house in Japan that never really went anywhere.

2. I use a gamma 2.2 workflow together with reinhard color mapping, so not strictly LWF but shares some of the advantages. I don't want this to turn into a LWF tutorial or discussion, but this post on cgpov.com pretty much sums up how I feel a gamma corrected workflow helps us as visualisation artists.

The reinhard color mapping helps to control burnt out (overexposed) areas. Screenshot of my color mapping set up: The burn value of the reinhard color mapping typically ranges from .75 for an exterior to 0.05 for an interior. You need to experiment with the value until you gain control over the burnt out areas. Here is an example with a camera pointing at the HDR sky:

For the final render, I use the Vray Frame Buffer, and add a slight s-curve to the output to compensate for the lack of contrast that the gamma corrected workflow introduces:

3. Add a vray dome light and load the exr/hdr using the max bitmap loader. Set the mapping type to environment/spherical. If you are using .hdr files, you can use the vrayHDRi loader instead. It makes no difference whether you use the bitmap loader or the vrayHDRi loader, the vrayHDRi adds a bit more control in that you can control the render multiplier independently from the viewport multplier. Set the output of the .exr to 1 and the vraylight multiplier to 1. If your hdr/exr has no alpha channel it seems you can save quite a bit of memory while rendering (approx 200mb in my case) if you load the exr/hdr as realpixel float rgb rather than the rgba option. (NOTE: ONLY applicable to 3dsmax 2009)
EDIT: Please don't pay too much attention to the 3dsmax 2009 realpixel hdri loading option, it just saved a little bit of memory which is why I mentioned it. I now use a later version of max and no longer have this option either.

4. To rotate the HDR you need to enter a U offset value from 0-1, so to rotate 180 degrees with would enter 0.5, 270 degrees 0.75 etc.
5. Add a vrayphysicalcamera, and set the aperture and shutter speed to something that would work for a typical outdoor scene, like F4, 1/200th & ISO 100. Remember that you are in effect using a completely manual camera, there is no 'P' or automatic mode so you need to experiment with different exposures until you get a good result.

6. Hit render and see what you get. If it looks too dark/bright I tend to adjust the bitmap's output rather than the vraylight multiplier, so that I can have a couple of ready setup HDRi's ready to drag and drop onto the dome light. In the examples below I use an output value of 1.5.
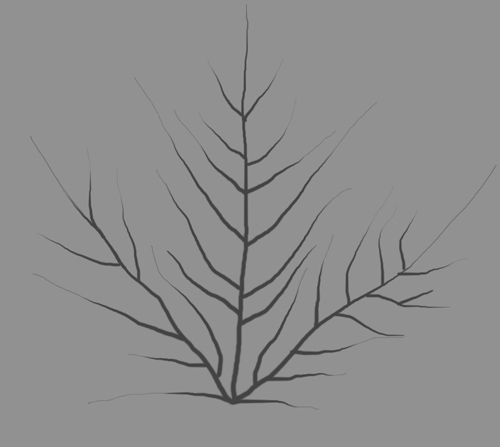
3D tree material tutorial - Leaves

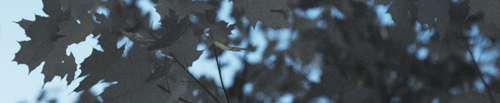
A tutorial on making leaf materials for 3d trees, in this case a sugar maple (in autumn).
Firstly, some observations on opacity mapped leaves vs. geometry leaves. As you can see in the image above, the images in this post were made using opacity mapped leaves. After some tests on my farnsworth house project, I have come to the conclusion that it is quicker in most cases to use opacity mapped leaves. Its true that in simple scenes trees with geometry leaves may render quicker as VRay doesnt have to calculate the opacity of thousands of leaves, but in dealing with complex scenes with millions of polygons the advantage in using (a lot) less RAM is huge. The processes involved in swapping opacity mapped plates for geometry are also very long winded and very tedious!
Exporting from Onyxtree. I went with 4 polygons per leaf so that the leaves aren't just flat. Remember to set the dimensions you want the individual leaves, and change the units when you export. You can also make it export 3 different leaf IDs with varying sizes. I normally export as a .obj file.
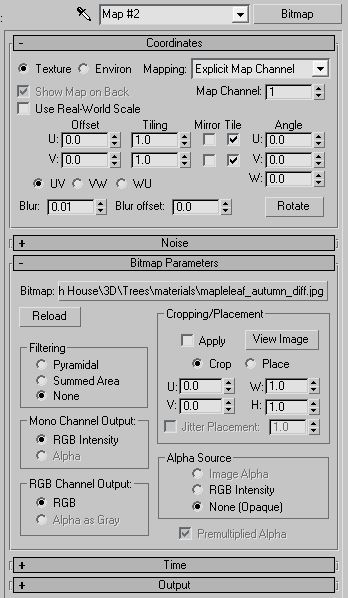
Opacity mapping. It's important to make sure the opacity map is just pure black or white, with a sharp edge. The opacity map I used can be found here (its not a great example!). You should also turn off filtering in the bitmap loader options (screenshot).
As imported to 3dsmax and given grey materials.
VRay2sidedMtl. The vray 2 sided material works best with geometry that has no thickness, which is what onyxtree outputs. It is a very quick way of generating a SSS (sub-surface scattering, think candle wax, skin, milk etc) type look. The image below is rendered using a vray2sidedmtl on all leaves with grey submaterials and a hand drawn image for the vein skeleton.
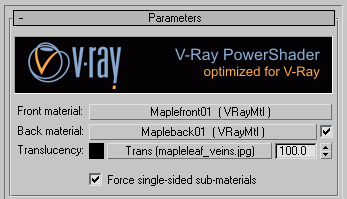
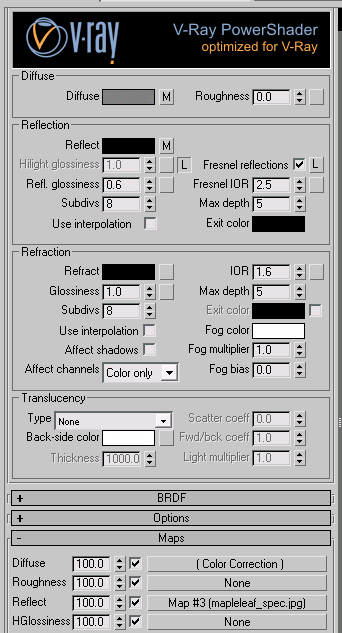
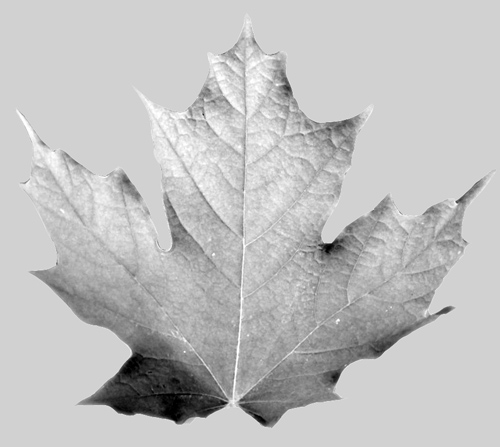
Front material. The front side material is a basic vraymaterial with a diffuse map and a reflection map. Click here for front vray material set up. The color correction map is to produce slightly different hues of leaf for each of the 3 sub leaf types (you should have got a mult-subobject material when you imported the .obj file). I usually make the first leaf and then copy and paste it to the 2nd and 3rd and just change the hue value slightly. The diffuse map looks like this, and the reflection map is a b&w copy with levels adjusted to make it more contrasty.

Render showing front leaf material on both sides with no transparency.
Back material. The back material is a copy of the front material but with a different diffuse bitmap and not quite as reflective. Note that I overlaid the veins skeleton jpg on top in photoshop as well. (without it, the veins looked too light when viewed from the underside as they took 100% of the lighter back material)

Render showing 2sided material with correct front/back materials but no transparency.
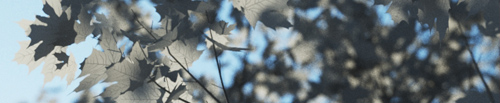
Finished result Click image for 800px version. Rendered using vrayphysicalsky and sun, and a vrayphysicalcamera.
Vray Dirt Tutorial

A quick tutorial on adding dirt to specific materials in Vray. A very useful application of the vraydirt shader in Vray is to make materials look dirty/weathered. Used in it's basic form, with default settings, vraydirt can be used to add a general darkening around edges/corners in your 3d model. It can also be modified to affect only areas directly below 3d features.
a - Shows vraydirt using it's default settings (dirt equal on all sides) b - Shows vraydirt using settings to force the dirt to work only in a downward direction c - As b, but with 'invert normal' ticked d - b and c used within a vraycomptex map, set to minimum
By experimenting with the distribution, falloff and z-bias values, I managed to get the downward effect I was looking for (exact settings in screen grab below). I then combine 2 versions of the vraydirt map inside a vraycomptex map. The first version is for concave creases, the other for convex creases by ticking 'invert normal'. The vraycomptex map is set to minimum so that it combines the two maps by always using the darkest rgb value.

Above is a render with a concrete material demonstrating the effect. In this case, the occluded map is the same as the unoccluded map but darker and with a slight rusty hue (achieved using a color correction map).
The diagram below shows how the material is made up, and shows the values I used:

To take this a step further, you could additionally add a map to vary the radius of the vraydirt effect. (Note that the value I used for radius is in mm)
And finally an animated gif showing renders with and without the vraydirt:
vrayRT for Architectural Visualisation
Very impressed with vrayRT so far, looks like it will be really useful for a lot of my work. Here's a 10min (longer than intended!) demonstration on vimeo (no sound). VrayRT is using my macpro (2.8 octo) and a slave i7 920.
Vray grass tutorial part 2
Before I get on to the material settings for the grass I'm going to show how I used similar techniques as in part 1 to make shorter grass. This time, I made 5 new individual blades, and made them a lot smaller, more random and also gave them a texture.
I made 3 lengths of grass, the longer ones had taller, less curved, blades. These were then scattered about 1000 times onto a 500mm dia. circle using advanced painter in randomize mode. The next step was to attach all blades into one editable mesh/poly and reset the xform, this seems to be vitally important before exporting it as a vrayproxy. Before I did this, the vrayproxy was using huge amounts of memory when rendering.
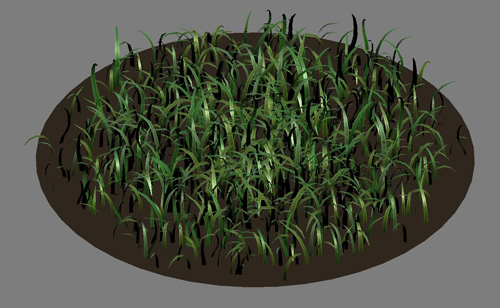
Short grass
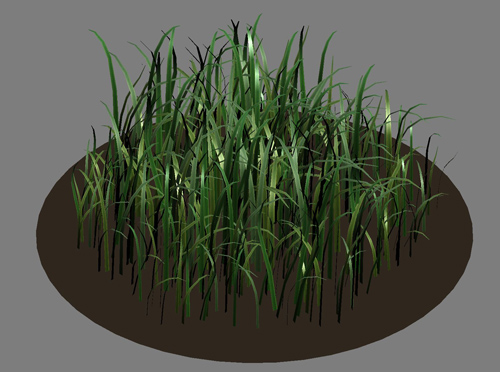
Longer grass - some stats: approx 8000 polys per proxy x 1000 proxies = approx 8 million total polygons. 3dsmax uses about 2 gig memory for this scene and each view rendered pretty quickly considering I had vrayfog and depth of field on.
Note: I use vrayscatter (a commercial plugin but well worth the money) to scatter the proxies. There are lots of tutorials for it here. You can also use scatter by Peter Watje, advanced painter, Forest by Itoosoft, Groundwiz Planter or 3dsmax particles.
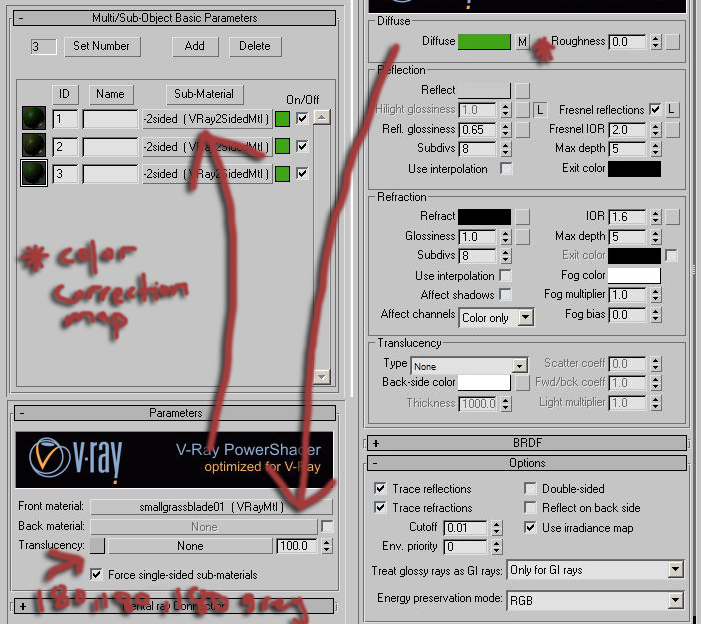
Material set up:
The main material for the grass is a multi-sub object with 3 materials within it. Each of the original 5 blades of grass were assigned one of these material IDs at random before they were scattered. Each material is a vraymaterial within a vray2sidedmaterial. Hopefully the screenshots are enough to describe the set up. The three sub materials are all essentially the same, and use the same Bitmap, but use a color correction map to subtly shift the colour (hue). The vray2sided material gives the SSS effect, and is the best option for thin geometry (no thickness) like grass and tree leaves.
You can optionally try turning off 'trace reflections' to try speeding things up. This means the grass will still pick up highlights from the sun, but won't pick up proper reflections, like the colour of the sky. I found the speed increase to be hardly noticeable in my tests, and it just didn't look as good.
UPDATE:
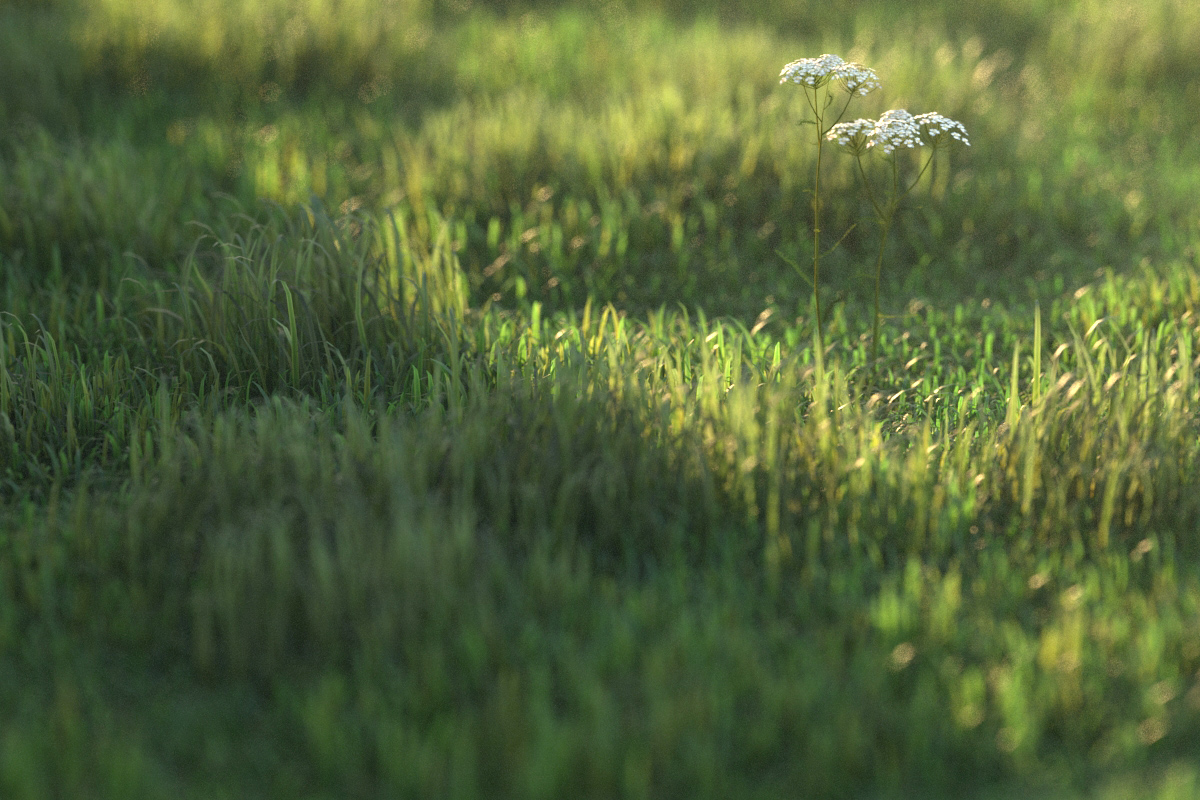
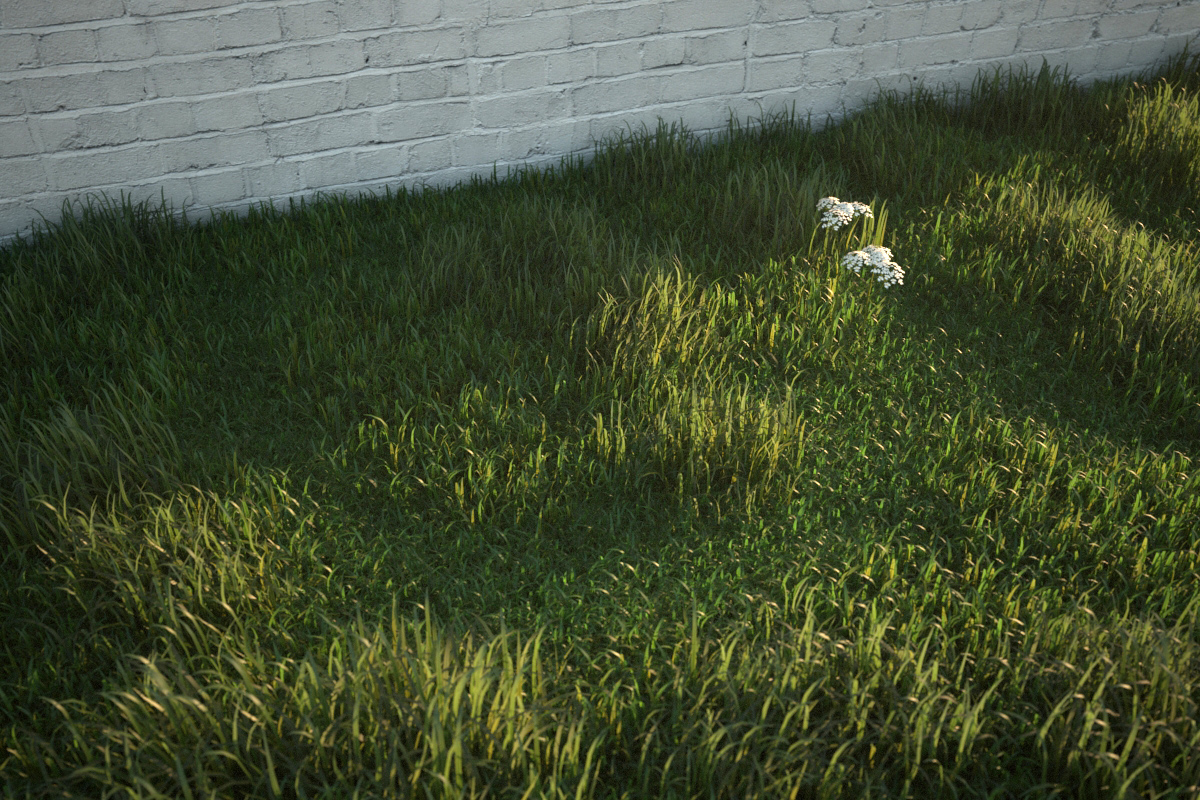
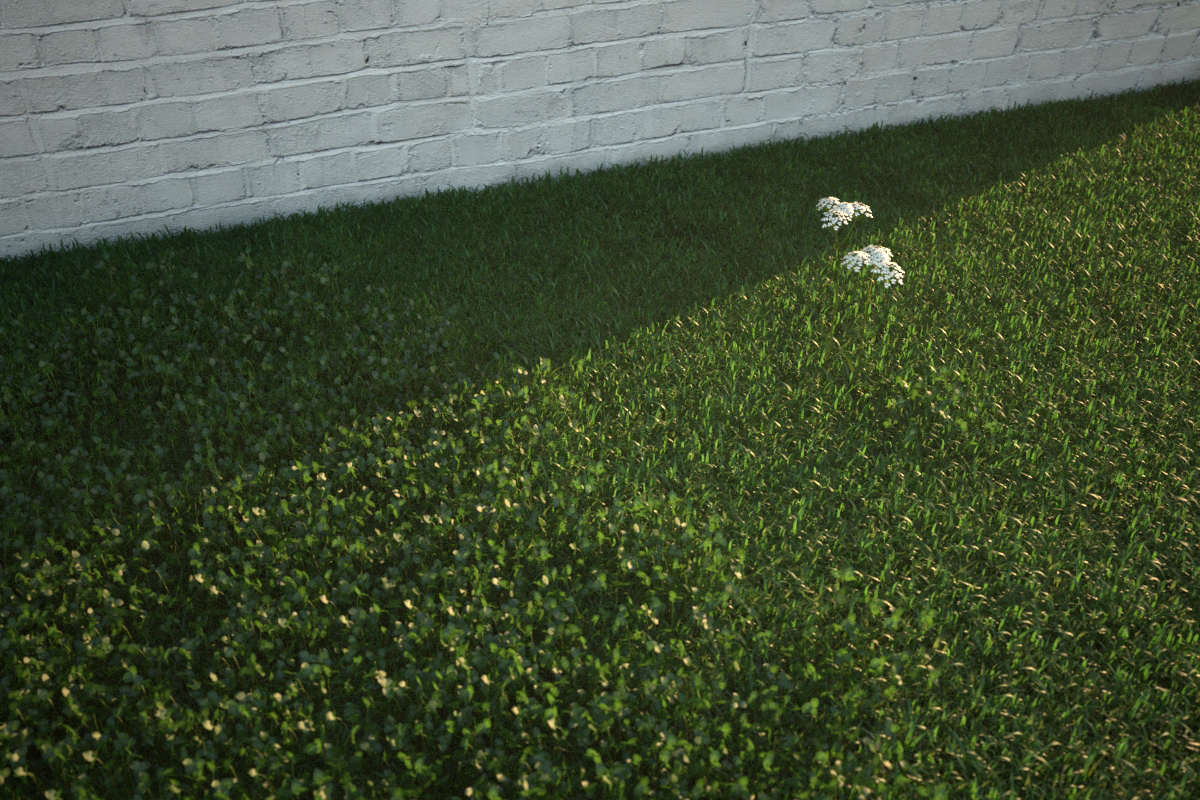
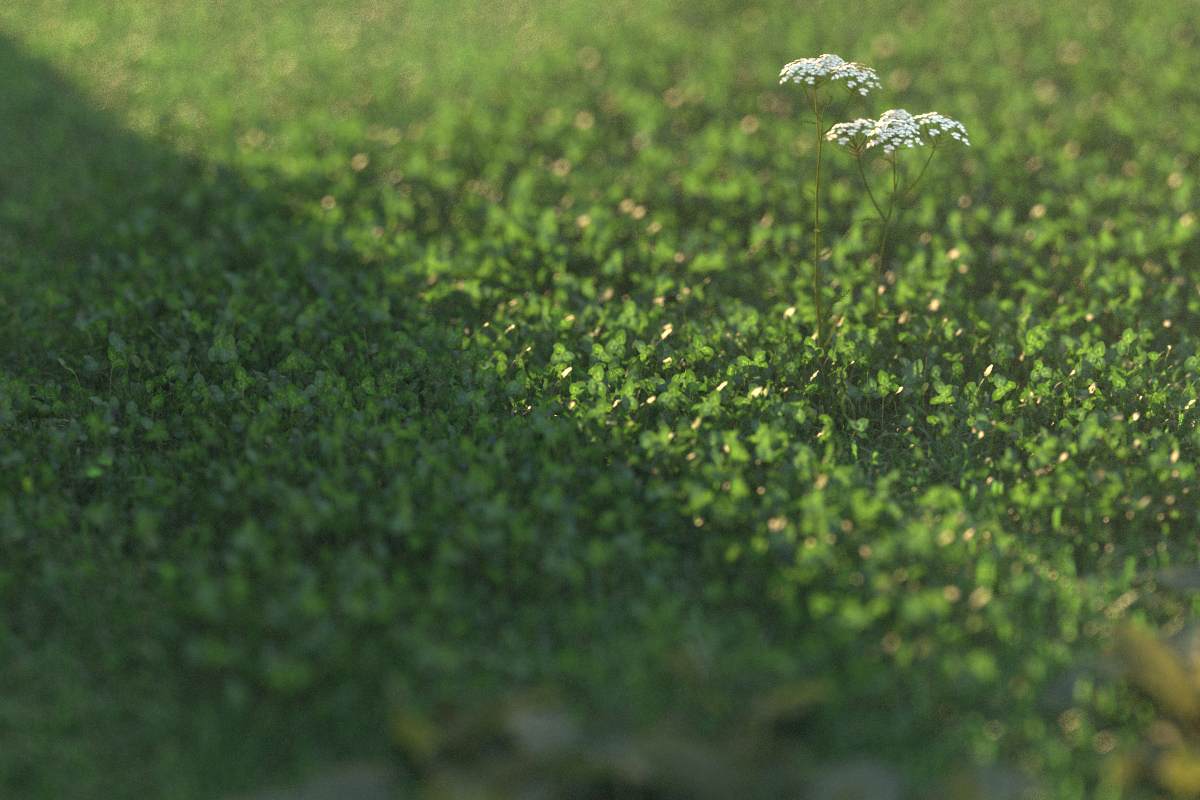
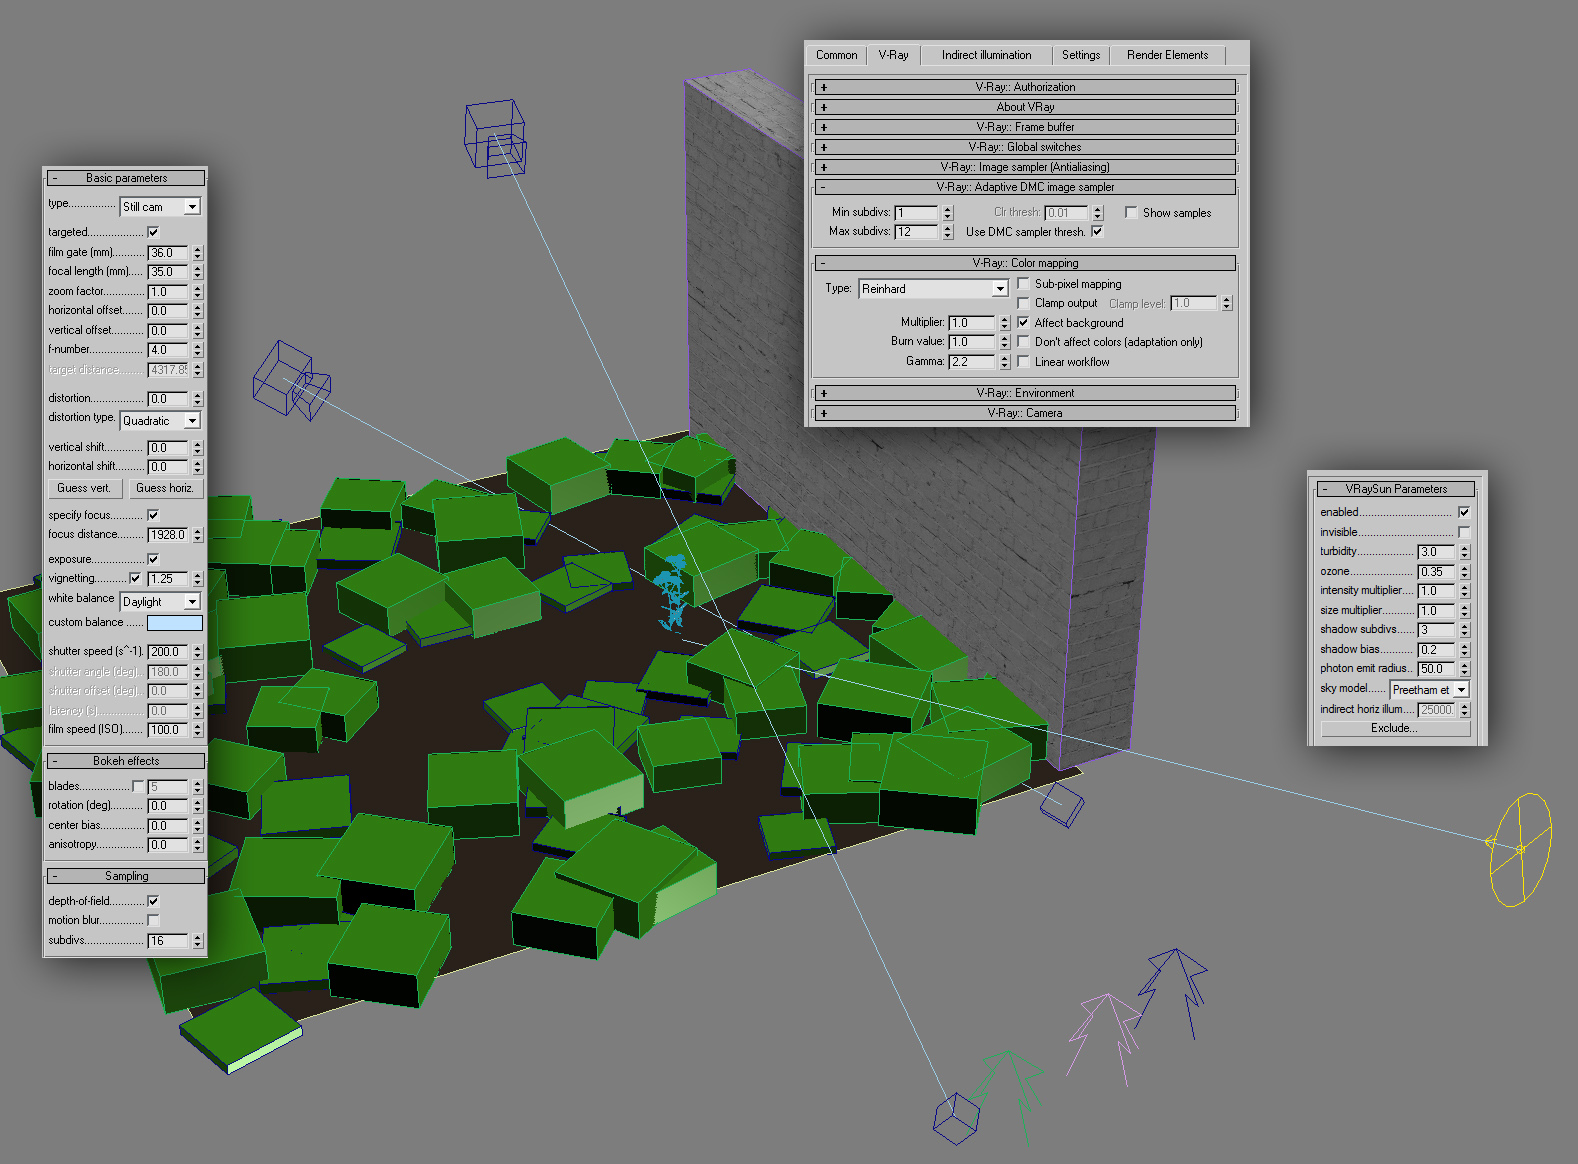
There's nothing special about my render settings or scene set up for this scene, just a vraysun & sky, vrayphysical camera and my usual colour mapping settings. To make the renders look a bit more interesting I decided to play a bit with sun and shadow, and also back lit the grass so that the transparent effect was evident. As you can see from the screengrab below, I have the sun coming from slightly behind the brick wall, and it is also very low in the sky. When experimenting with materials it's very important to set your scene up to mimic an effect you would see in the real world.
If you are interested in downloading an example scene, please visit the tutorials section of vray.info and navigate to the 2nd part of my grass tutorial.
HDR Skydome Tutorial
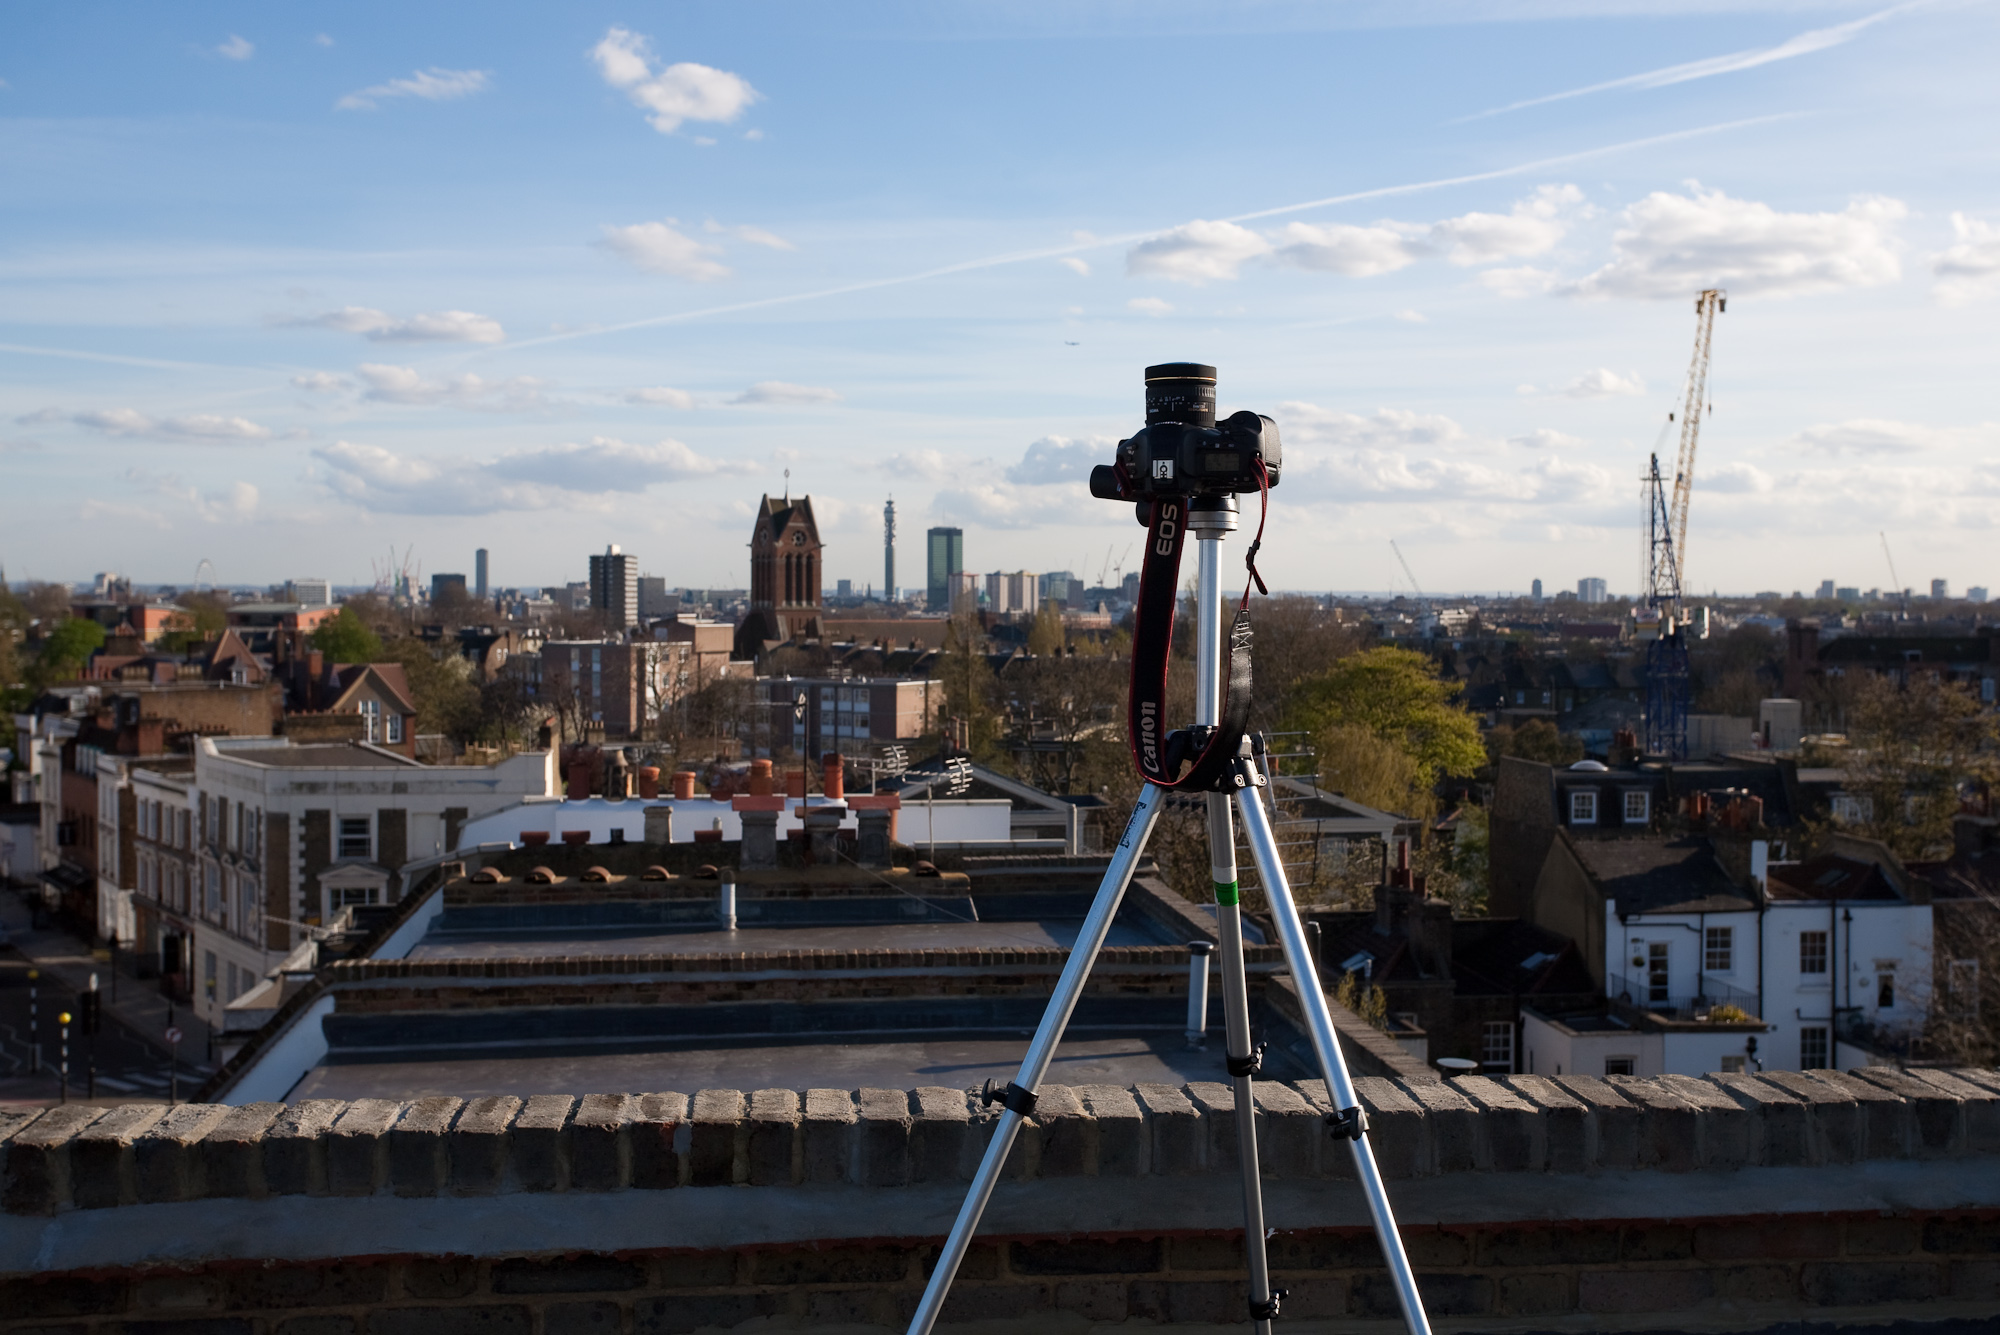
For the 7 shots used to make this HDR skydome I used a Canon 1ds mk3 which has superb auto bracketing abilities as well as being very fast and having 21 megapixels. The lens used for these shots was a sigma 8mm fisheye which gives a complete circular image on a full frame dslr. I set the AEB to 7 shots 2 stops apart, which gave exposure times of 0.5s, 1/8, 1/30, 1/125, 1/500, 1/2000 & 1/8000 all at F20. This range of exposures is crucial for capturing the full dynamic range of the sun, which will eventually mean you get good strong shadows when you use the HDR image to light a 3d scene.
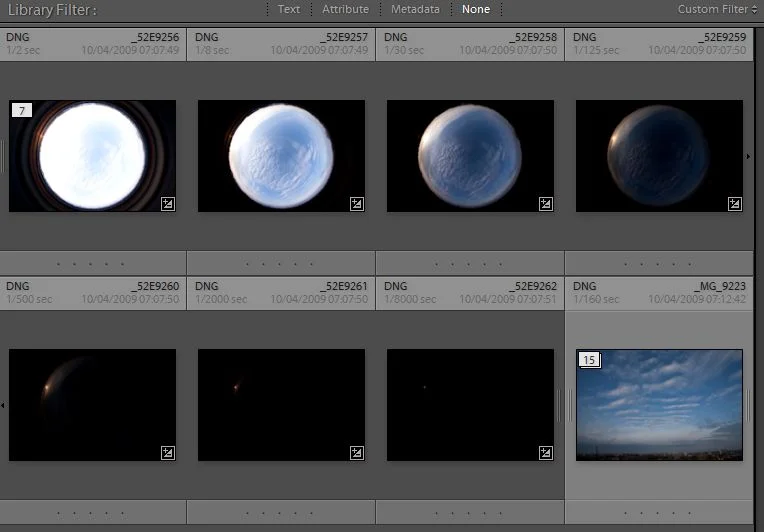
- Process raw files to remove chromatic aberration & to ensure white balance is consistent. I do this in Adobe Lightroom (pictured below), where you can copy the develop settings from the first file, and then batch process the remaining ones to save time.
- Export as 16 bit TIFFs
- Load TIFFs into Photomatix or Photoshop to blend into a single HDR, I use Photomatix as it seems to do a better job of removing ghosting artifacts (from moving clouds).
- Load HDR image file into Hugin. Choose lens type as fisheye when importing, and set the Horizontal field of view to 285 degrees (I arrived at this mostly through trial and error!)
- Hugin will complain that more than 1 image is required - ignore.
- Set pitch of image to 90, and adjust yaw so that sun is centred. If you know where the sun is, it helps later on when you come to rotating the skydome in your 3d application.
- in the stitcher tab, I take off soft blending as there is only 1 image, and press the 'calculate optimal size' button. Then hit 'Stitch Now!' (saving as a tif)
- Open 32bit tif in photoshop, clone out anything you dont want (dust in my case), save as 32 bit exr. Image below shows how the HDR should look when you drag the exposure slider in photoshop.


Sometime, I'll follow this up with something about how I use these in 3dsmax & Vray!
vray override material

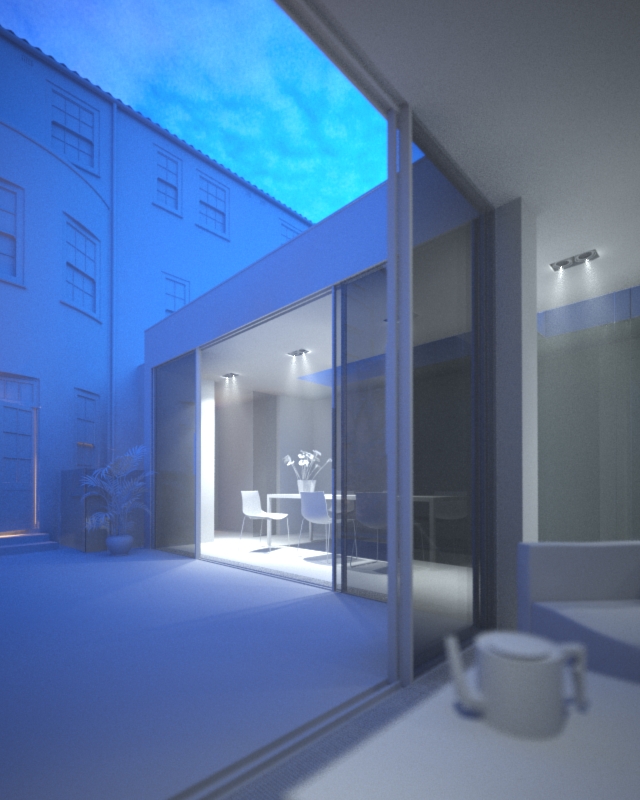
The vray override material is a great way of previewing/checking your lighting even when you are a long way into a project. The scene below uses a homemade dusk HDR skydome and vrayIES internal lights which have a colour temperature of 4500 (6000 in the second image) kelvin. I wanted to check the effect 2 alternative IES web files made to the internal lighting in distribution as well as the fancy patterns on the walls. I find having all the materials a neutral colour really helps in balancing natural & artificial light.
To set it up, you first make a mid grey material in the material editor and then drag it into the vray override mtl slot in global switches (in this instance I made a material called '200' which has the rgb values 200,200,200):

then you can specify which objects to exclude from the override material (normally glass) in the include/exclude dialog:
