

A tutorial on making leaf materials for 3d trees, in this case a sugar maple (in autumn).

Firstly, some observations on opacity mapped leaves vs. geometry leaves. As you can see in the image above, the images in this post were made using opacity mapped leaves. After some tests on my farnsworth house project, I have come to the conclusion that it is quicker in most cases to use opacity mapped leaves. Its true that in simple scenes trees with geometry leaves may render quicker as VRay doesnt have to calculate the opacity of thousands of leaves, but in dealing with complex scenes with millions of polygons the advantage in using (a lot) less RAM is huge. The processes involved in swapping opacity mapped plates for geometry are also very long winded and very tedious!
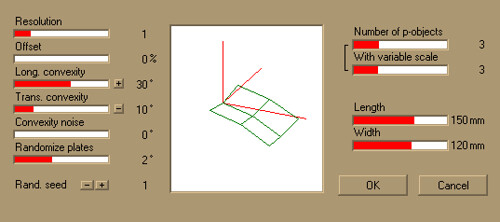
Exporting from Onyxtree. I went with 4 polygons per leaf so that the leaves aren't just flat. Remember to set the dimensions you want the individual leaves, and change the units when you export. You can also make it export 3 different leaf IDs with varying sizes. I normally export as a .obj file.
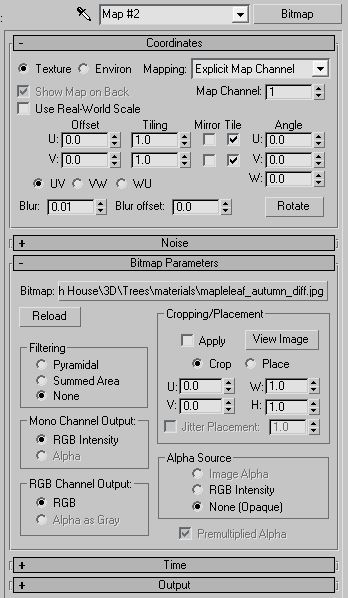
Opacity mapping. It's important to make sure the opacity map is just pure black or white, with a sharp edge. The opacity map I used can be found here (its not a great example!). You should also turn off filtering in the bitmap loader options (screenshot).

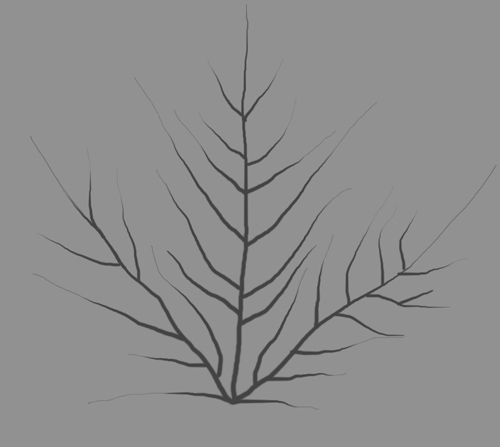
As imported to 3dsmax and given grey materials.
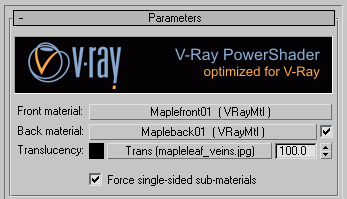
VRay2sidedMtl. The vray 2 sided material works best with geometry that has no thickness, which is what onyxtree outputs. It is a very quick way of generating a SSS (sub-surface scattering, think candle wax, skin, milk etc) type look. The image below is rendered using a vray2sidedmtl on all leaves with grey submaterials and a hand drawn image for the vein skeleton.

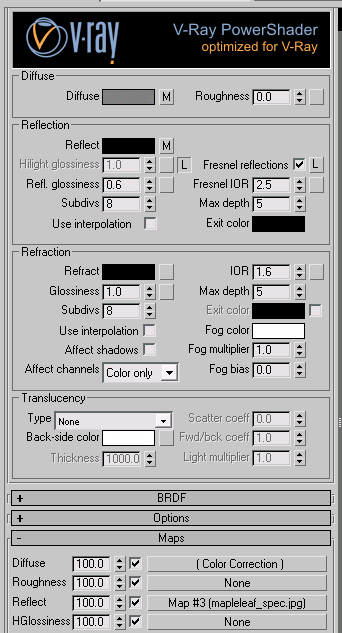
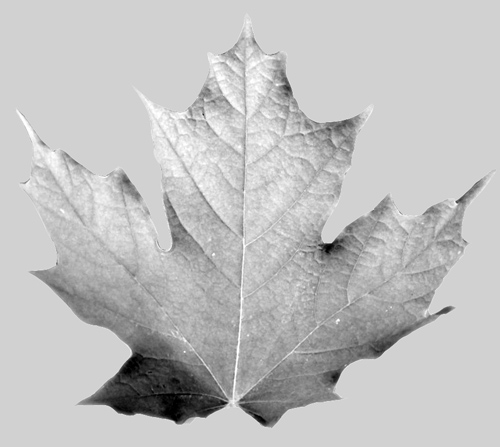
Front material. The front side material is a basic vraymaterial with a diffuse map and a reflection map. Click here for front vray material set up. The color correction map is to produce slightly different hues of leaf for each of the 3 sub leaf types (you should have got a mult-subobject material when you imported the .obj file). I usually make the first leaf and then copy and paste it to the 2nd and 3rd and just change the hue value slightly. The diffuse map looks like this, and the reflection map is a b&w copy with levels adjusted to make it more contrasty.

Render showing front leaf material on both sides with no transparency.
Back material. The back material is a copy of the front material but with a different diffuse bitmap and not quite as reflective. Note that I overlaid the veins skeleton jpg on top in photoshop as well. (without it, the veins looked too light when viewed from the underside as they took 100% of the lighter back material)

Render showing 2sided material with correct front/back materials but no transparency.
Finished result Click image for 800px version. Rendered using vrayphysicalsky and sun, and a vrayphysicalcamera.