A quick tutorial on adding dirt to specific materials in Vray. A very useful application of the vraydirt shader in Vray is to make materials look dirty/weathered. Used in it's basic form, with default settings, vraydirt can be used to add a general darkening around edges/corners in your 3d model. It can also be modified to affect only areas directly below 3d features.
a - Shows vraydirt using it's default settings (dirt equal on all sides) b - Shows vraydirt using settings to force the dirt to work only in a downward direction c - As b, but with 'invert normal' ticked d - b and c used within a vraycomptex map, set to minimum
By experimenting with the distribution, falloff and z-bias values, I managed to get the downward effect I was looking for (exact settings in screen grab below). I then combine 2 versions of the vraydirt map inside a vraycomptex map. The first version is for concave creases, the other for convex creases by ticking 'invert normal'. The vraycomptex map is set to minimum so that it combines the two maps by always using the darkest rgb value.

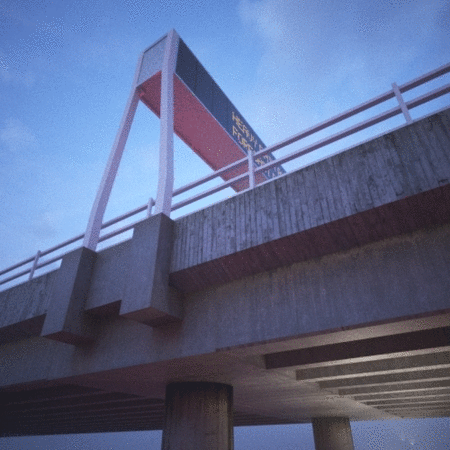
Above is a render with a concrete material demonstrating the effect. In this case, the occluded map is the same as the unoccluded map but darker and with a slight rusty hue (achieved using a color correction map).
The diagram below shows how the material is made up, and shows the values I used:

To take this a step further, you could additionally add a map to vary the radius of the vraydirt effect. (Note that the value I used for radius is in mm)
And finally an animated gif showing renders with and without the vraydirt: