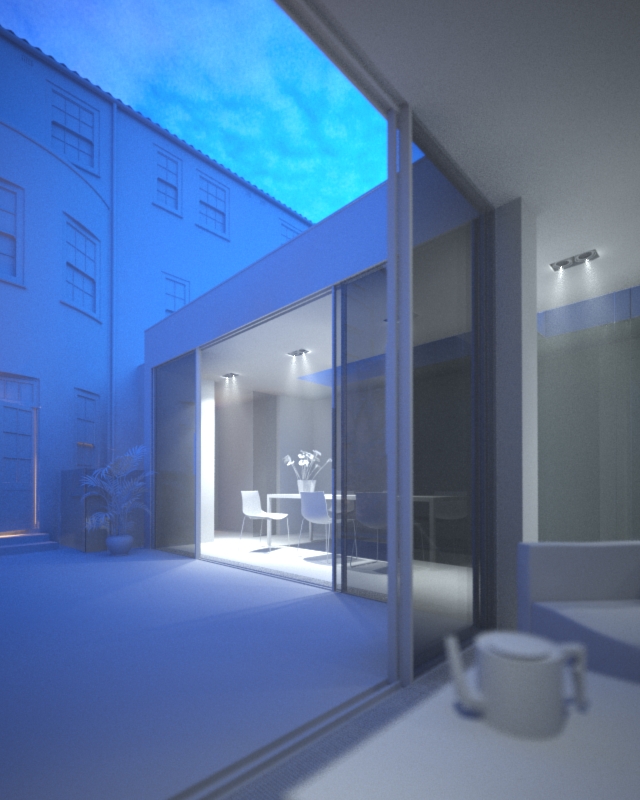
The vray override material is a great way of previewing/checking your lighting even when you are a long way into a project. The scene below uses a homemade dusk HDR skydome and vrayIES internal lights which have a colour temperature of 4500 (6000 in the second image) kelvin. I wanted to check the effect 2 alternative IES web files made to the internal lighting in distribution as well as the fancy patterns on the walls. I find having all the materials a neutral colour really helps in balancing natural & artificial light.
To set it up, you first make a mid grey material in the material editor and then drag it into the vray override mtl slot in global switches (in this instance I made a material called ‘200′ which has the rgb values 200,200,200):

then you can specify which objects to exclude from the override material (normally glass) in the include/exclude dialog:


hey, peter, thank you for the tutorial!…. images above are looking great..
i don’t entirely understand why do you exclude the glass from the illumination………… does it affect the reflections or refractions?
not from illumination, from the override material, Just about to update the images to make it clearer!
ah… i see… guess, it was just the dialog box that confused me a bit… since it had the illumination and shadow casting exclude option…… tnx!
That’s my teapot!
hi peter..!
i never use vray domelight actually, but im using it on my recent project now.
i want to ask about it, you are using vray dome with hdri as a texture, so what is the different if you are using hdri and put it in environment as GI ?
btw, this is nice blog..!
Hi Fietter!
From what I can understand, the vraydome light is the generally the better option when using HDR images as it does importance sampling whereas just using a HDR image in the background is GI based. So if your HDR image has a nice strong sun in it, vray is treating that more as a normal light and it will sample the areas being affected by it much better. Or in other words, the domelight will be noisier but more accurate, a background map will be more ’splotchy’ but less noisy! In my opinion, noise is by far the lesser evil…
you can remove this noise, for example i blur my hdri a little bit, and it helps
Hi Peter
Great images. I have allready learmed a lot from these tutorials. I just have a question on the light test that you did. the fog that you put in… what settings is it? it helps a lot to understand how the light is working. And also, does push the render time up a lot?
Well, I must admit I cheated a bit for the fog! I have atmosphere gizmos under each spotlight confining the fog to just those areas, so the fog doesnt really affect the general lighting. The vrayfog does push up render times, but it works really well so I accept the extra waiting time happily. I think the settings for the vrayfog were default with a distance of about 20m, no texture for the density or anything fancy.
Hi, Peter. Nice imeges. I’d like to know, how did you make the volume light effect for the lamps. Thank you.
Hi Nils,
The volume light effect was done with box gizmos and vrayenvironmentfog
hello peter…. i try to make something like in this tutorial but it doesn’t work. ( i think i don’t understand……. about this…)
may i ask……. how you make a something like volume light under IES….. or that shape appear because vrayenvifog…. thx a lot….. i hope i will get the answer soon….
i really like your blog.. always give me new inspiration…..great blog!!! thaks a lot…. and thank you.
Hi, Nice tutorial but i’m a bit unsure where i find the include/exclude dialogue.
Are you able to point me in the right direction?
Thanks
render setup/vray tab/global switches
Hmm still no joy. My global switches area apears the same as yours but i cant seem to see any include/exclude dialogue. Ive placed the material into the override slot which i use a fair bit but never known about being able to exclude materials.
Thanks for your time.
hmm, maybe you are using an old version of vray?
Think i have it now its just the box under the overide material slot…I had thought that was associated with the option next to it: glossy effects and so disregarded it.
Thanks…this will be very handy in the future.
yeah bit of an interface design issue there!