
Before I get on to the material settings for the grass I'm going to show how I used similar techniques as in part 1 to make shorter grass. This time, I made 5 new individual blades, and made them a lot smaller, more random and also gave them a texture.
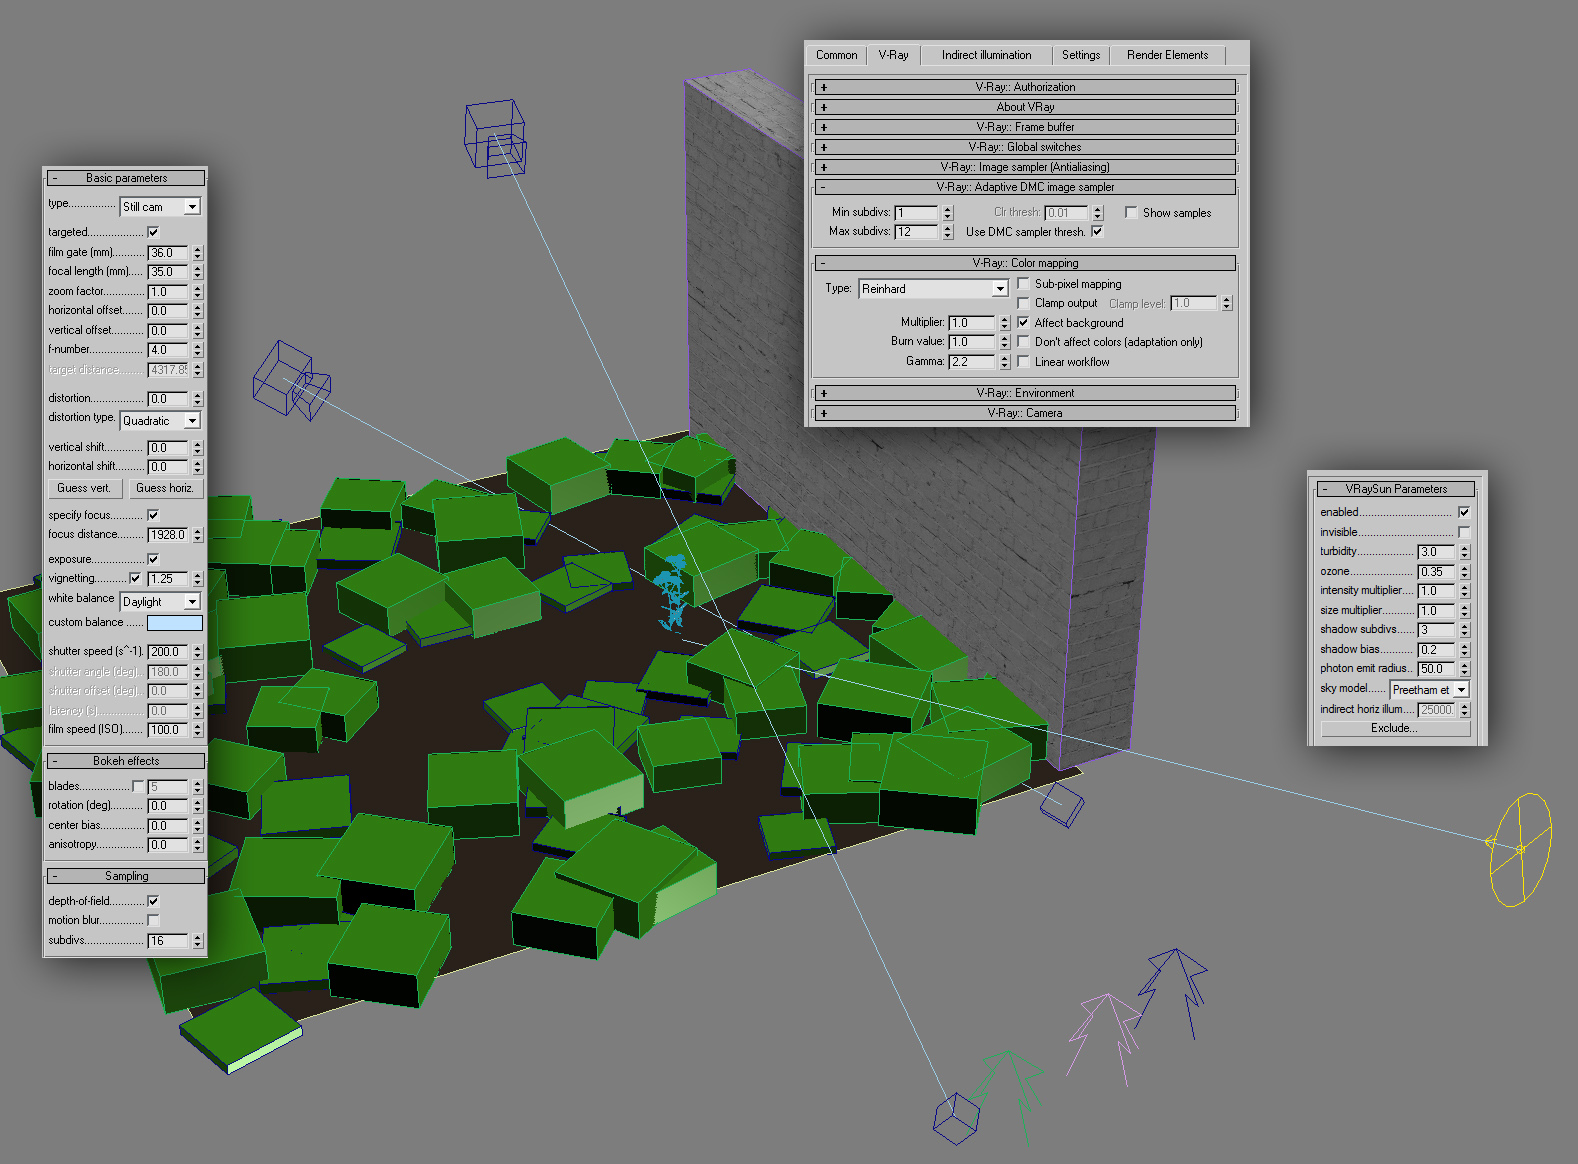
I made 3 lengths of grass, the longer ones had taller, less curved, blades. These were then scattered about 1000 times onto a 500mm dia. circle using advanced painter in randomize mode. The next step was to attach all blades into one editable mesh/poly and reset the xform, this seems to be vitally important before exporting it as a vrayproxy. Before I did this, the vrayproxy was using huge amounts of memory when rendering.
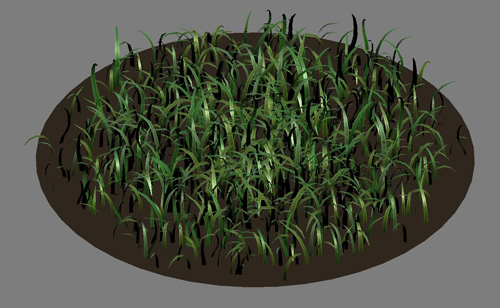
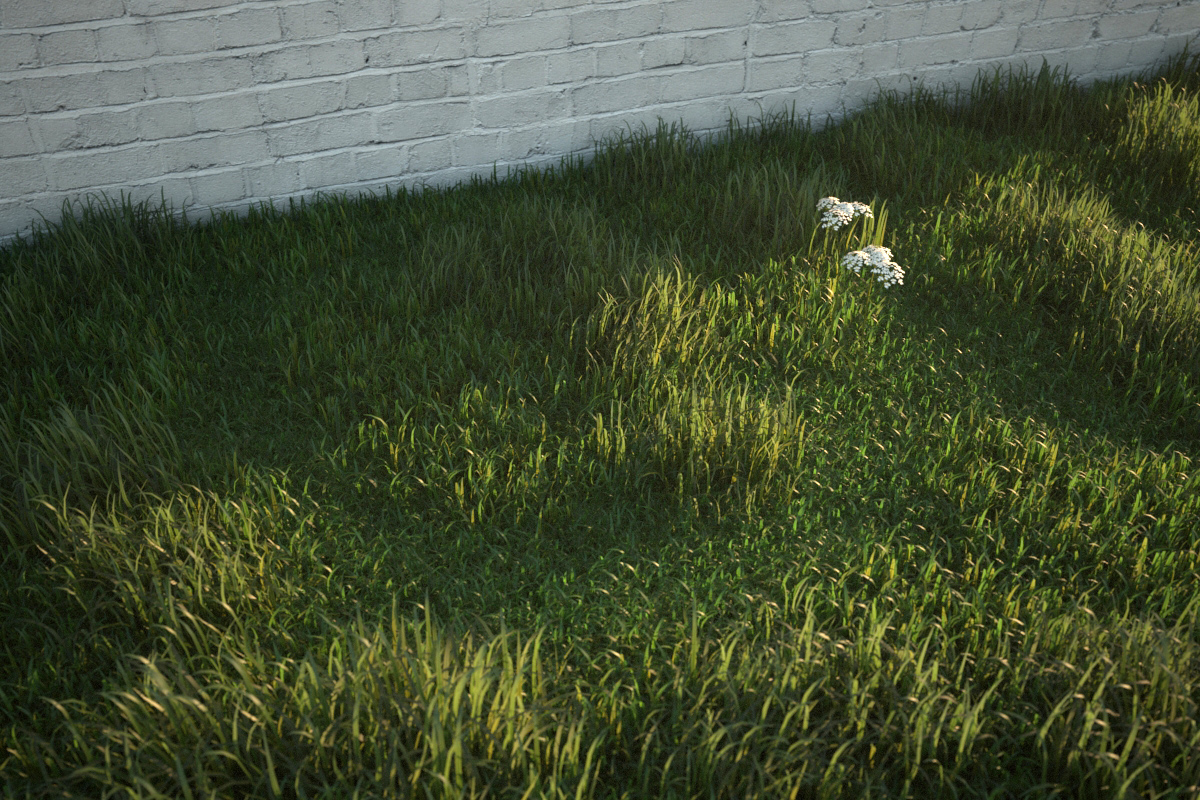
Short grass
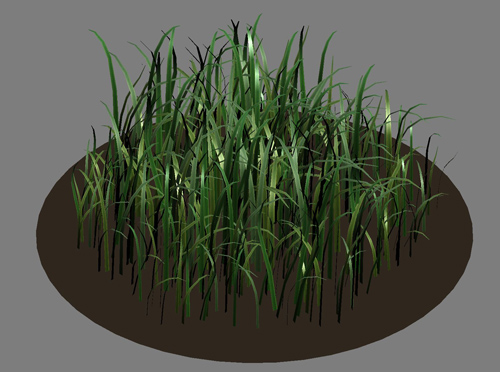
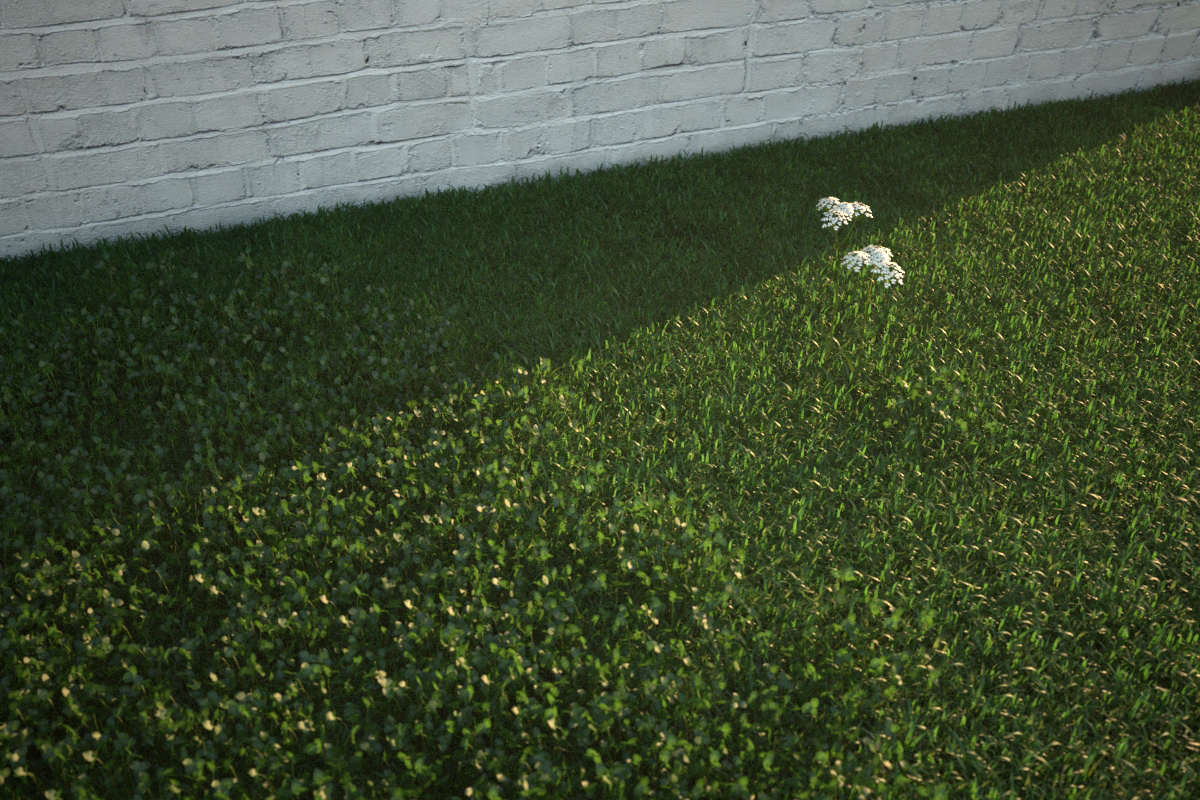
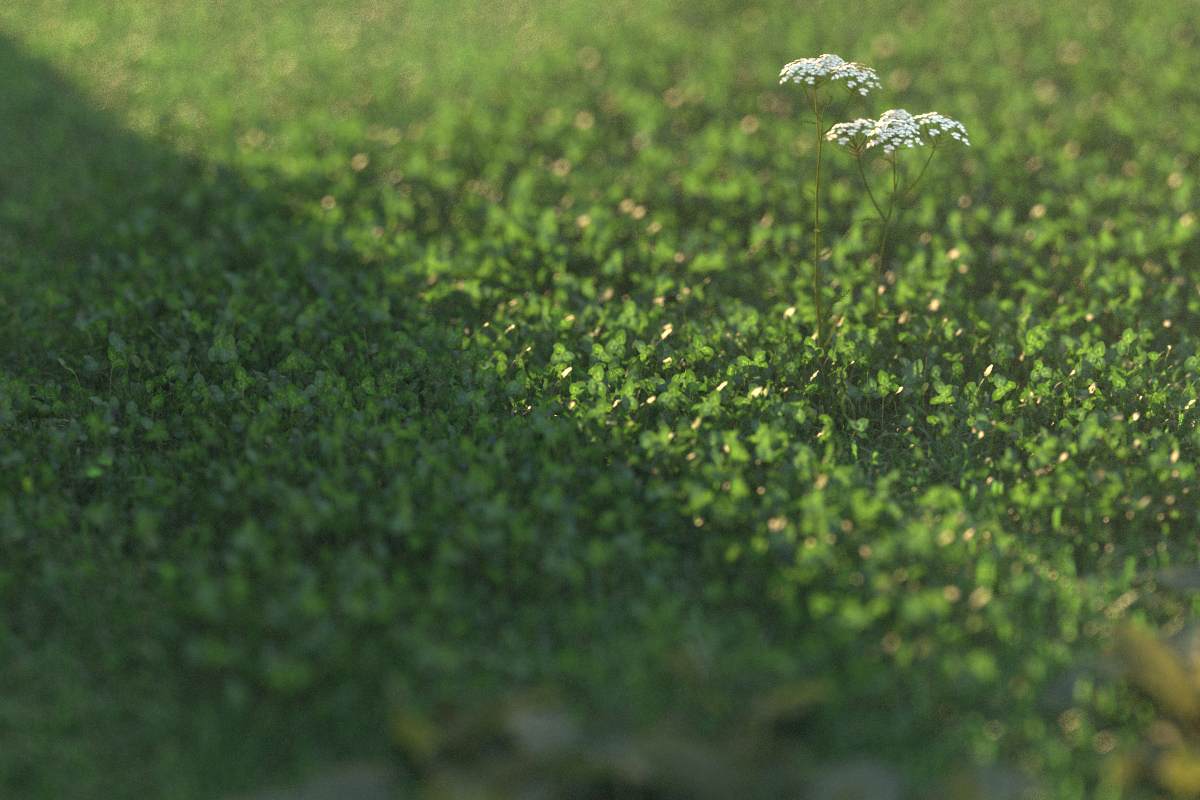
Longer grass - some stats: approx 8000 polys per proxy x 1000 proxies = approx 8 million total polygons. 3dsmax uses about 2 gig memory for this scene and each view rendered pretty quickly considering I had vrayfog and depth of field on.
Note: I use vrayscatter (a commercial plugin but well worth the money) to scatter the proxies. There are lots of tutorials for it here. You can also use scatter by Peter Watje, advanced painter, Forest by Itoosoft, Groundwiz Planter or 3dsmax particles.
Material set up:
The main material for the grass is a multi-sub object with 3 materials within it. Each of the original 5 blades of grass were assigned one of these material IDs at random before they were scattered. Each material is a vraymaterial within a vray2sidedmaterial. Hopefully the screenshots are enough to describe the set up. The three sub materials are all essentially the same, and use the same Bitmap, but use a color correction map to subtly shift the colour (hue). The vray2sided material gives the SSS effect, and is the best option for thin geometry (no thickness) like grass and tree leaves.
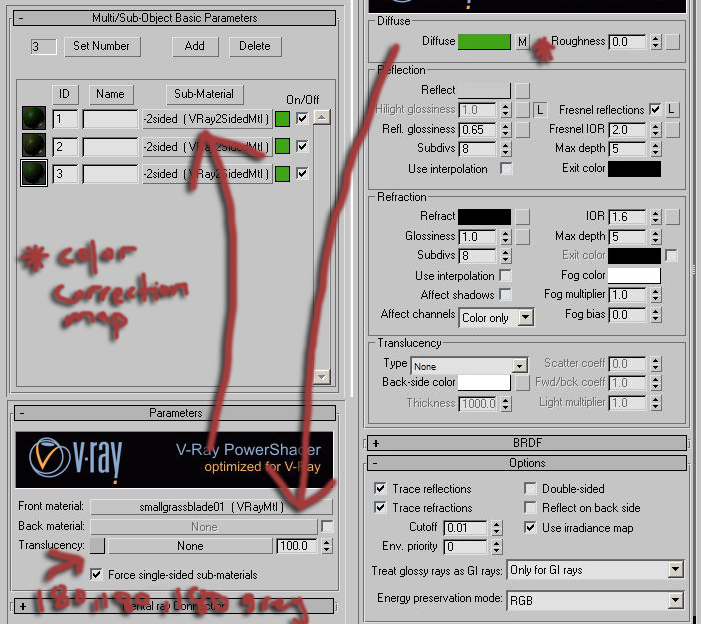
You can optionally try turning off 'trace reflections' to try speeding things up. This means the grass will still pick up highlights from the sun, but won't pick up proper reflections, like the colour of the sky. I found the speed increase to be hardly noticeable in my tests, and it just didn't look as good.
UPDATE:
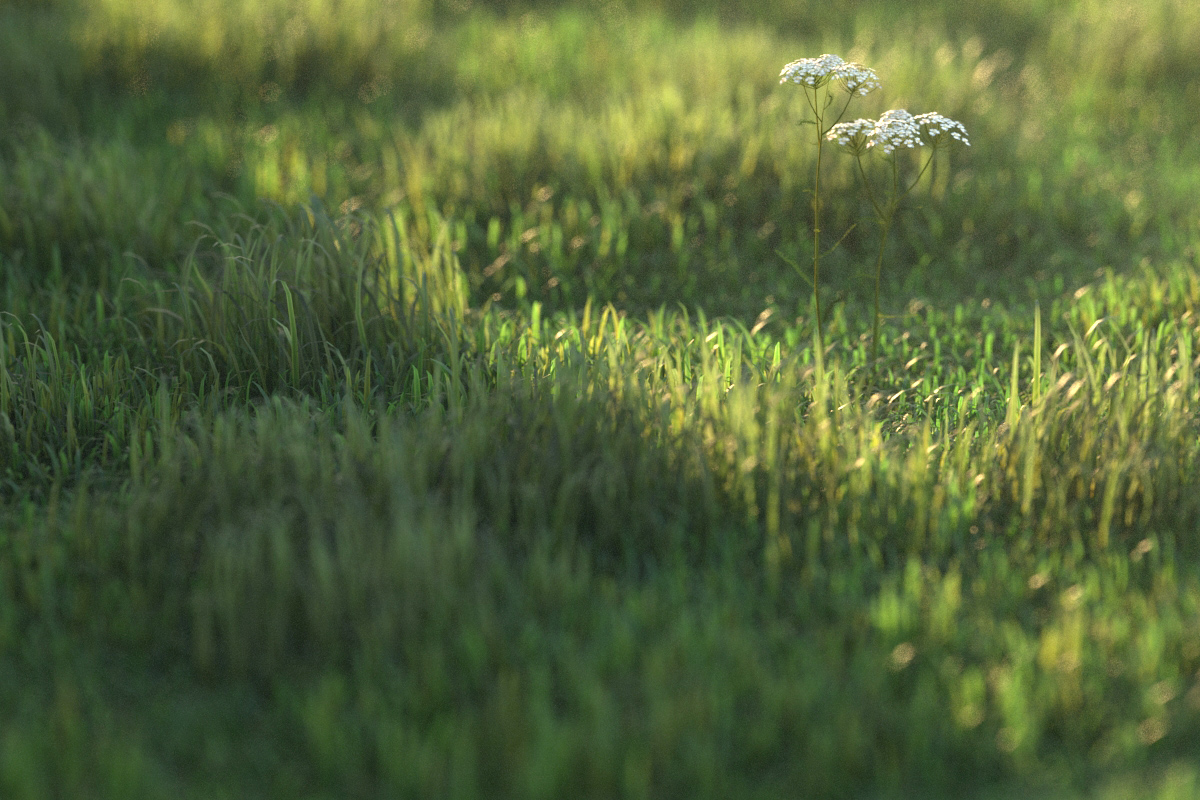
There's nothing special about my render settings or scene set up for this scene, just a vraysun & sky, vrayphysical camera and my usual colour mapping settings. To make the renders look a bit more interesting I decided to play a bit with sun and shadow, and also back lit the grass so that the transparent effect was evident. As you can see from the screengrab below, I have the sun coming from slightly behind the brick wall, and it is also very low in the sky. When experimenting with materials it's very important to set your scene up to mimic an effect you would see in the real world.
If you are interested in downloading an example scene, please visit the tutorials section of vray.info and navigate to the 2nd part of my grass tutorial.